


How to create a flow chart

A flowchart is a diagram of a process or system that maps out the main functions of a product, application, or website. Figma's flowchart maker makes it easy for designers and product owners to capture workflows, map out website navigation, communicate step-by-step processes, and plan projects.
Why flowcharts matter
Flowcharts can boost design team communication and streamline product workflows by improving:
- Clarity. Since 65% of people are visual learners, flowchart diagrams help make complex ideas or new processes easier to follow and remember..
- Coordination. Flowcharts break down a big project into a logical sequence of steps, so that everyone on the team can easily see what happens when—and where they fit in.
- Efficiency. Creating a flowchart reveals redundant steps and points of confusion in any process, so that you can pinpoint areas for improvement.
- Documentation. Flowcharts document your methods for future reference, so that decisions are transparent and new team members can get up to speed quickly
What do flowchart symbols mean?
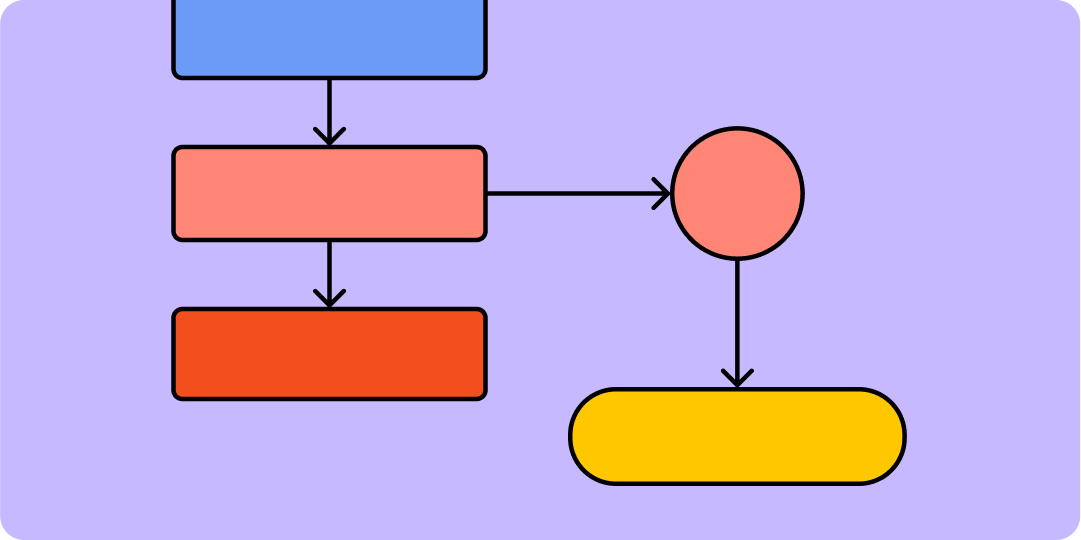
To make a flowchart, designers plot out these key flowchart symbols:
- Rectangles represent steps or actions. Flowcharts that outline a process step by step use rectangles to indicate each step or action. In user experience (UX) design, common actions include clicking and scrolling.
- Lines and arrows connect steps, showing the intended direction, sequence, or flow. For example, a flowchart capturing an e-commerce user journey might use arrows to map out user flows from landing page to checkout.
- Rhombus symbols mark steps where the user must input data. On an e-commerce flow, a rhombus might indicate when users must input a shipping address.
- Circles usually mark a starting or stopping point in a flow. Once a user has completed checkout and leaves an e-commerce site, the end of that journey might be marked on the flowchart with a circle.
- [symbol: diamond] Diamonds represent decisions, or questions requiring a choice. At a decision point marked by a diamond, a flow may split into different directions or processes.
How to make a flowchart
To create a flowchart, you can use Figma's flowchart maker or follow these five steps.
Step 1: Title your flowchart
Every flowchart should have an obvious purpose, clearly spelled out in the title. Whether you're building a design prototype for stakeholders or mocking up UI interactions, capturing that purpose in your flowchart title helps get everyone on the same page.
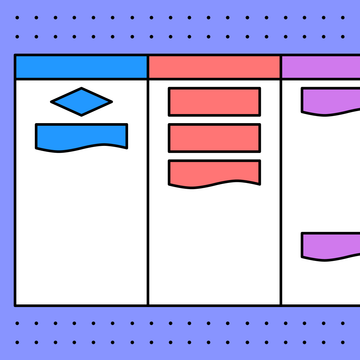
Step 2: Select your flowchart template
Figma provides easy, editable flowchart templates with drag-and-drop symbols. Figma automatically saves edits as you work, and lets you share ideas with team members via an online collaborative whiteboard.
To get started, take your pick of Figma flowchart templates:
- Process flowcharts break down a big challenge or task into a series of steps and choices.
- Simple flowcharts help simplify any process, making it easier to explain and build.
- Systems flowcharts help visualize complex systems and identify key players.
Step 3: Define flowchart symbols
Flowcharts work like maps, with key milestones and turning points marked by flowchart symbols (see above)—plus any custom symbols you decide to add. Just be sure to include a key on your flowchart so everyone can easily see what your symbols mean.
Step 4: Connect your symbols with arrows
Plot out your flowchart using arrows to connect one symbol to the next in a logical sequence. The direction of the arrows makes following a sequential progression easy, from beginning to end.
In addition to forward-pointing arrows, you might include three other types of arrows on flowcharts:
- Return arrows mark a return to previous points in the flowchart. For example, a return arrow might indicate that a website visitor can return to the homepage from a product page.
- Dotted-line arrows represent predicted or suggested actions with uncertain outcomes.
- Forked arrows indicate different possible directions, depending on a user's choice. Mark decision points with a diamond, and label each part of the forking arrow leading down a different path with the option it represents.
Step 5: Polish your flowchart
A cohesive design and color scheme creates immediate interest in your flowchart without distracting from its content. Figma makes it easy to adjust design elements without editing them individually, so that they remain cohesive. You can set styles to match your brand and meet accessibility standards with your chosen font type and size, thickness of arrows and lines, background color and contrast, and distance between grid elements. You can always rely on a color wheel generator to help you create a well balanced color palette to highlight your flowcharts.
Pro tip: define your custom flowchart symbols and styles as components, so that you can apply them consistently across all versions of your flowchart.
3 ways to share your flowchart with Figma
- Download your flowchart as a PNG, PDF, JPG, or HTML5 and share it via email.
- Print your flowchart.
- Invite people to view or collaborate by sharing a link to your flowchart in Figma.
Go with the flow using Figma
Using Figma's online flowchart maker to craft high-quality flowcharts, you can streamline design processes and keep projects on track for success. FigJm's diagram tool allows your team to share ideas, collaborate, and outline processes quickly—so you can get even more creative.
Start your flowchart with Figma
Sources
[1] https://asq.org/quality-resources/flowchart
[2] https://www.indeed.com/career-advice/career-development/28-flowchart-symbols-and-meanings
Keep reading

What is a UML diagram
UML diagrams can help you plan complex systems and processes.
Learn more

How to create a swimlane diagram
Swimlane diagrams give flowcharts an extra-informative superpower.
Learn more

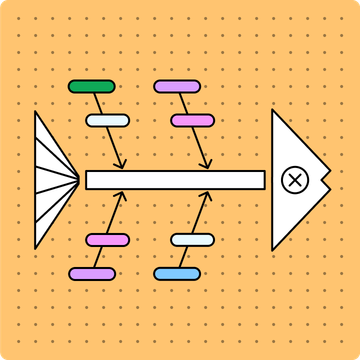
What is a fishbone diagram
Use a fishbone diagram to help you solve problems by understanding what’s causing them.
Learn more