With the foundations of this Western Region layout complete, DAN EVASON reveals how he brought the scenery to life in the second of our two features illustrating the construction of Parkend North in 'OO' gauge.
WITH PARKEND NORTH'S construction well under way and the layout operational, it was time to start being creative, but before I started cracking open the PVA glue I sketched an overall image of how the layout might look once completed. I find this helps tie all the snippets of ideas I have in my head together as it was important that Parkend North had the feel and look of being set somewhere in the Forest of Dean in a decaying state of disrepair and neglect.
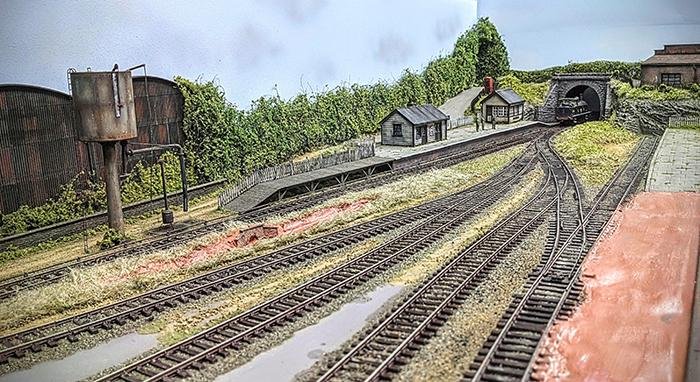
The station building and platform were key to the build and to the placement of the rest of the buildings and infrastructure. As Parkend North would never have been a busy station, I decided to use one of the Wills small station building kits. I have built a few of these and I find them quick and simple to fit together. Painting this station building was fun with a selection of acrylic paints, washes and weathering powders. I also took it a stage further by adding a few signs of vandalism with smashed windows hanging off or missing signs to suggest it is in a decaying state.
A mixed platform surface - part brick and slab, part wood – was also planned using products from the Wills range. It was decided that at some point in its life the platform had been extended to allow two coaches and a locomotive to attend.
Parkend North yard points are mainly controlled by lever ground frames but two are controlled by a small platform signalbox. The signalbox is from Ratio: this sadly didn’t fit together so well like the rest. The signalbox needed some hefty filing to get it right, but once completed and weathered it looks as if it is in the final days of operation.
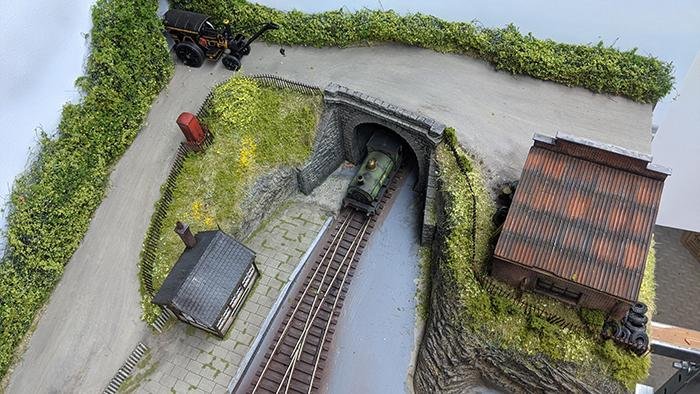
Away from the railway, a road was added over the railway line via a small stone bridge from Peco. This road also gives access to the station, which was created with mounting card. I attached the card using PVA and superglued it in to areas where necessary. When I cut the road out, I cut it as one continuous section as I was keen not to have a joint which would have been hard to blend in.
Working fast, I painted the road with a basic grey acrylic colour first which was then quickly followed by a wash of Burnt Umber and black – all from the Daler Rowney range. While the paint was still wet, I dragged a tissue along the road - this smudges the colours together leaving a realistic look.
FREIGHT RAILWAY
The coal yard road section was also produced in the same way apart from the crossing point which was made with Das modelling air dry clay which was worked in to the ballast and the card which formed the road section away from the yard and to the loading platform.
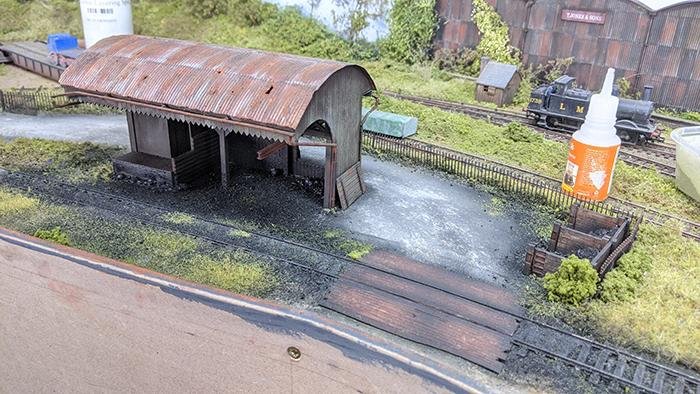
With the station section complete, it was now time to add other elements to the layout including a flat topped GWR water tower from a Ratio kit which was painted and weathered with Vallejo acrylics. This was followed by a Ratio coal merchants plastic kit as this was the perfect size for the area.
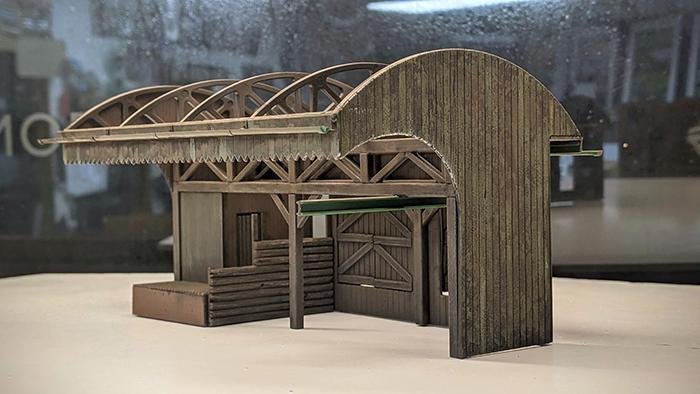
For an old kit, the Ratio coal merchants building went together really well with very little effort. I painted it using acrylics again. Following on the theme of the whole layout depicting it’s last days in use I gave the coal merchants a rusty and damaged roof with doors missing. To continue the goods yard theme, a small loading dock with a crane was added using Wills kits while a scratchbuilt low relief warehouse from fine corrugated card provides a backdrop to the station area.
As Parkend North is set in the Forest of Dean, the layout needed trees, and lots of them. One area in particular has benefitted from the addition of trees and that is the embankment behind the turntable. This area also gained a Second World War concrete pillbox for added interest which was made to look as if the concrete had cracked over time to expose its reinforced steelwork. This was created using a knife and some strands of copper wire to create the steel.
Further buildings include a permanent way hut and coal staithes from the Intentio laser cut building kit collection plus a small garage at the roadside which we featured as a full step by step guide in HM173.
THE EXTENSION
Moving over to the extension of Parkend North –a short 2ft 6in long scenic section with a single track running line – the scenic highlight of this zone is the railway crossing a river before reaching the off-scene storage yard.
For the farm I used one of Braeside Models’ ruined cottages. These come pre-painted, but I added timber roof trusses using stained matchsticks to represent the missing roof. Using balsa wood, I built a farm outbuilding to house an old tractor to which I added Scale Model Scenery’s roller and farm scrap pack for added detail.
The river scene was added as a last-minute idea, but I think it was a great touch to the overall layout. I created the river using a selection of green and brown paints as the base for the canal. As the canal was only a waterline model, it was important to create that sense of depth with the paint by using darker shades in the centre and lighter at the edges.
To create the water effect I used clear PVA from the Range which dries clear and with a shine to it making it ideal for this low level water scene. While the PVA was still drying, I added a Skytrex resin canal boat that I built for another project to generate a focal point in this part of the scene.
Originally the bridge crossing the river was going to be a stone built structure, but looking back to reference photographs of the Forest of Dean area, it was more common to see iron bridges in place so a bridge of this style was built using Peco sides.
GROUND COVER
The scenics and getting the feel of Forest of Dean was key to this whole project. Armed with a roll of hanging basket liner and with two large boxes of sea foam and rubberised horsehair from War World Scenics, I set to work.
First, I built up the woodland floor using a selection of static grasses and scatters then selecting sea foam for suitable trees. The larger trees were placed at the back to screen the backscene and give the woodland area depth. For the rough grassy areas in and around the track, I used hanging basket liner as a starting point, finished off with a selection of static grasses and flocks which really bring the whole layout together.
One major part that brings any layout to life in my opinion are the figures and a visit to the Modelu3D website brought the miniature population required for Parkend North to the doormat. Each figure was individually painted then added to the layout to create new atmosphere.
Parkend North’s stock roster has a GWR/BR Western Region theme allowing it to focus on the real railway operations of the Forest of Dean. There won’t be any big express locomotives of heavy freight engines either, as this branch line is more likely to see a ‘14XX’ with an autocoach or a ‘2251’ 0-6-0 pottering into the yard with a small pick-up goods delivering fresh coal and taking away agricultural produce. It’s a world away from today, but isn’t that part of the reason for a model railway?
Parkend North’s stock roster has a GWR/BR Western Region theme allowing it to focus on the real railway operations of the Forest of Dean.

STEP BY STEP: BUILDING THE SCENERY FOR PARKEND NORTH
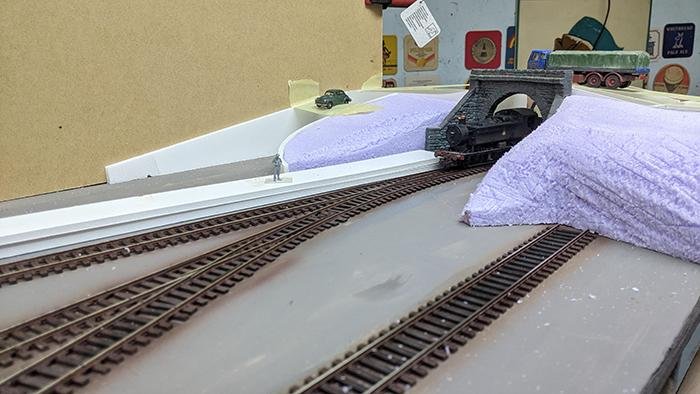
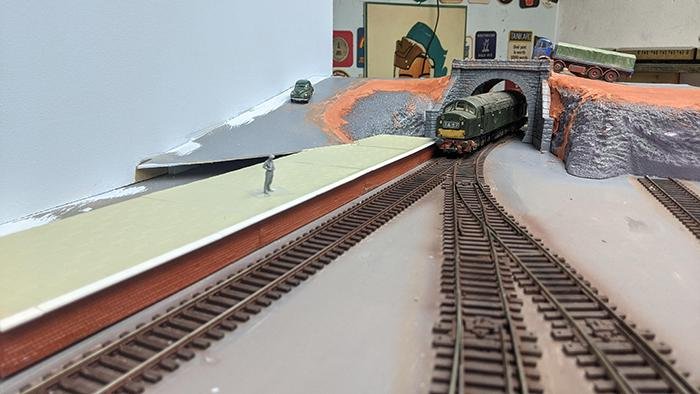
1. Using high density foam, I took a saw and a sharp knife to it and carved the basic shape of the embankment. I also used foamboard to create the profile of the road ready for attaching the mounting card road surface.
2. With the mounting card road glued and bent into shape, it was now time to seal it all. I used a spray can of Halfords grey primer to seal the surfaces.
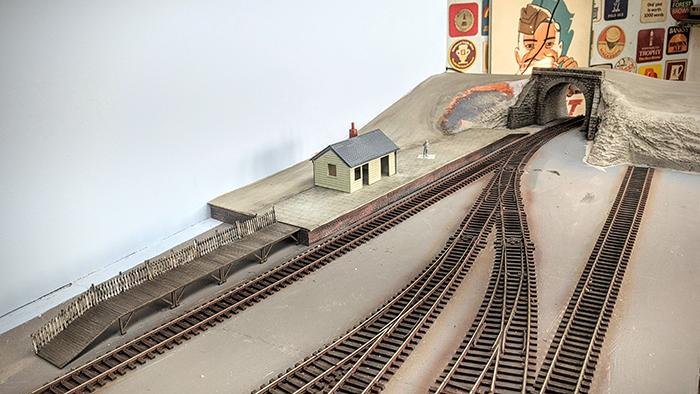
3. Once grey primer was dry, I then turned my attention to building the platform as I wanted the road to the station and platform to blend in together at the same height. This was achieved using Das air dry clay. This also gave a hard surface for the garage to sit on and blend the edges of the road in.
4. With the platform and its added timber extension painted and weathered using an array of acrylics and weathering powders, it was time to turn my attention to the road using a selection of greys, burnt umbers and a hint of black, working in layers. Using a wet brush, I applied these colours randomly making sure the brush marks were in the same direction. Then armed with a dry tissue and while the paint was still wet, I simply wiped the paints back off again in the direction of the road.
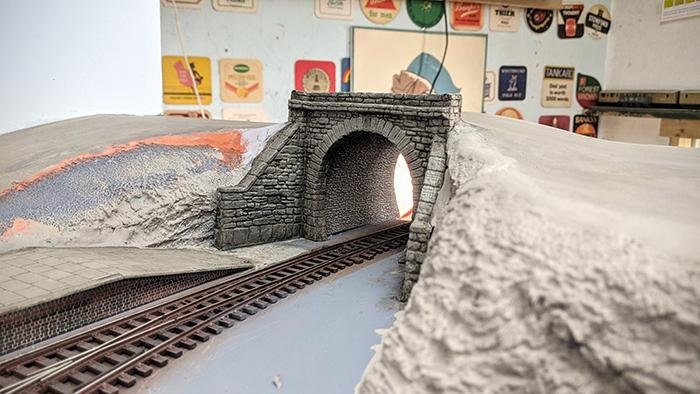
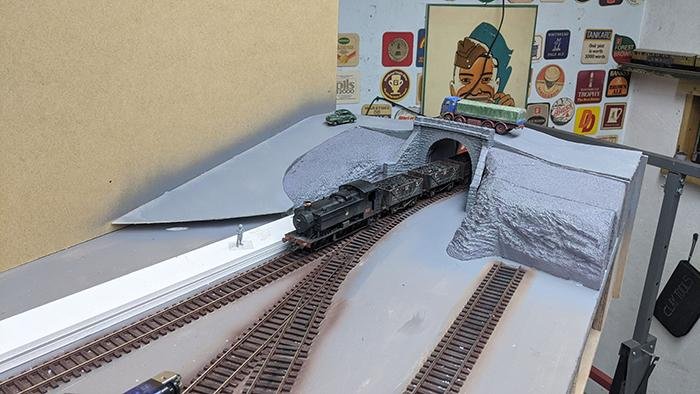
5. Turning my attention to the Peco tunnel fronts (Cat No. 5045), after a coat of primer, I used Flory wash working through black, brown and grey applied one at a time. Once dry, I used a tissue to remove the excess Flory wash to give light and shade to the grotty tunnel mouth stone work.
6. I then started to apply the hanging basket liner. I also bought the rock faces to life with a selection of Daler Rowney acrylic paints by using Yellow, Burnt Umber, Burnt Sienna and finally a black wash to finish. Once dry, I dry-brushed the edges of the rock using some Buff Titanium from the Daler Rowney range.
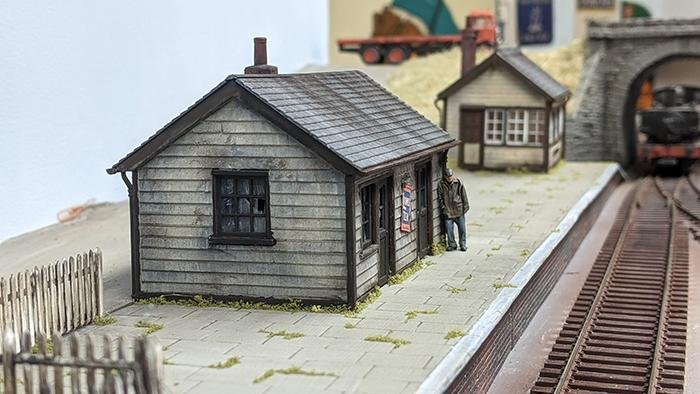
7. The station building is a Wills kit (Cat No. SS67). I added signs from Scale Model Scenery along with damaged glazing using a scalpel. I also built the Ratio small signalbox (503) to sit on the end of the platform. This was to look run down too, but it still had to be in an operational state. I added weeds and moss to the joints in the slabs of the platform held in place with PVA and using Burnt Grass turf from the Woodland Scenics range.
8. I chose the Ratio coal merchant building (Cat No. 525) as this would fit in well with the Forest of Dean setting. Painting started with priming in a selection of Tamiya browns. Next, I applied watered down Vallejo Flat Green to create the faded look. I also painted each plank of wood one at a time.
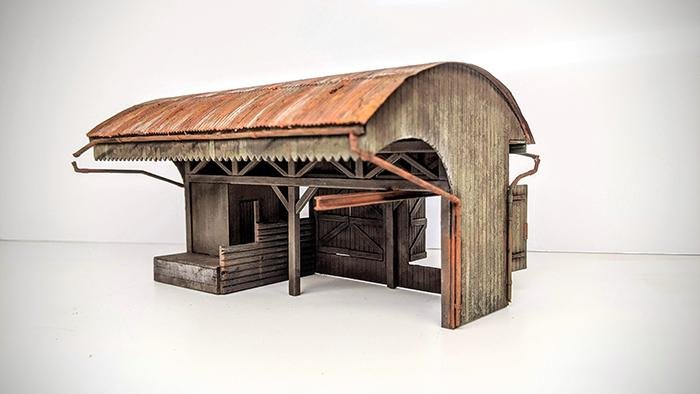
9. The final stages of the Ratio coal merchant building were the metalwork. The hoist gantry was painted using MIG Rusty Rails, medium and light rust. The gutters were painted green to start with then rust applied to them as well. The tin roof started with grey primer which was followed by working of each individual panel with the same rust colours and a flat brush in a downward motion. The damaged areas of the roof were highlighted with MIG Rusty Rain weathering powder. After everything was dry I then applied a thin black wash to the roof.
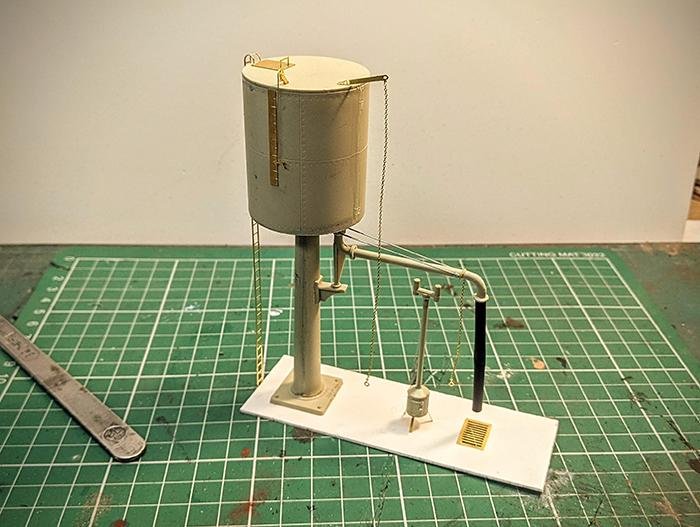
10. The GWR flat top water tower is built from a Ratio kit (Cat No. 528). The only thing I upgraded was the rubber water hose as for some reason I couldn’t find a glue that would take to it. I ended up replacing it with a length of heatshrink which was more to scale.
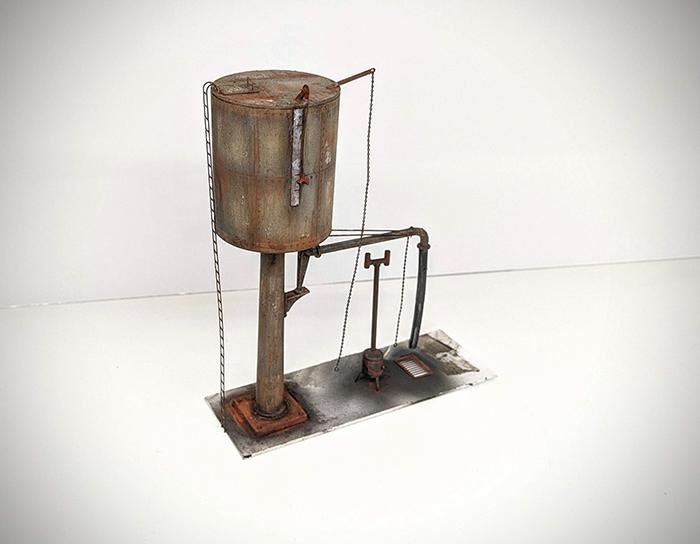
11. I then gave the water tower a coat of grey primer as a base colour of grey. Then I set to work on the GWR light and dark stone paint scheme. Next came weathering powders and washes to heavily weather it to give the it a worn appearance.
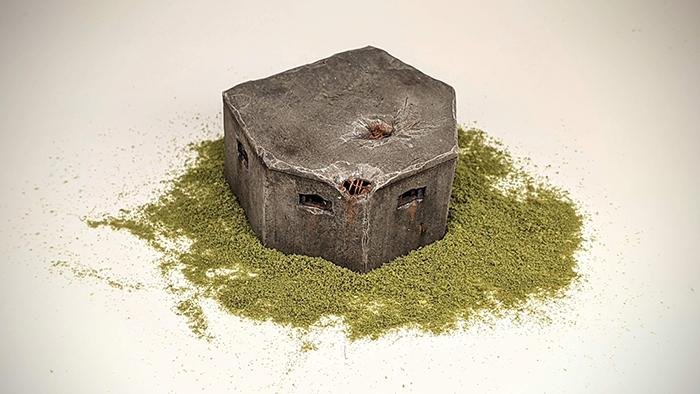
12. The pillbox is another Wills kit (SS74) which I modified to age it. As the plastic was thick I used a Stanley knife and very carefully chipped away at the corner and roof section to make holes to represent weather damage over the years. I also wanted to push the detail that little bit more, so I used some small strands of copper cable to act as the steel reinforcing bars that would be there in real life. It was then painted in Daler Rowney light grey with a Dark Dirt Flory wash applied. Before this dried, I dabbed the pillbox with a small sponge giving this dirty concrete effect. The copper cable strands are painted a red rust colour, with hints of rust stained streaks evident down the walls of the pillbox.
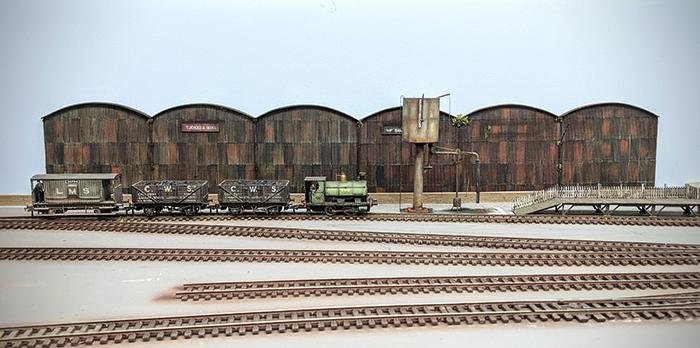
13. An industrial connection was an important part of the backscene. Due to the limited space I came up with some low relief warehouses using some spare fine corrugated card that would sit along the backscene. Using the same process as the tin roof on the coal merchant, I used a flat paint brush roughly the scale size of width of a sheet of corrugated tin and slowly painted each sheet until all had been filled in. Then a simple black wash over the building finished it. Modelu downpipes and Scale Model Scenery signage provided the final touches.

14. With the layout starting to take shape, a key aspect of any build is figures. I opted for Modelu's range of 3D printed figures, and painting them really brought them to life. A selection of Vallejo acrylics were used for this process.
15. With the low relief warehouse glued in place and the backscene painted blue it was time to make the rear tall hedge. This was built using World War Scenics rubberised horsehair torn and cut to shape. I sprayed the hedges with fixing spray and added a selection of Green Scene scatters. The hedge was attached to the layout using PVA glue.
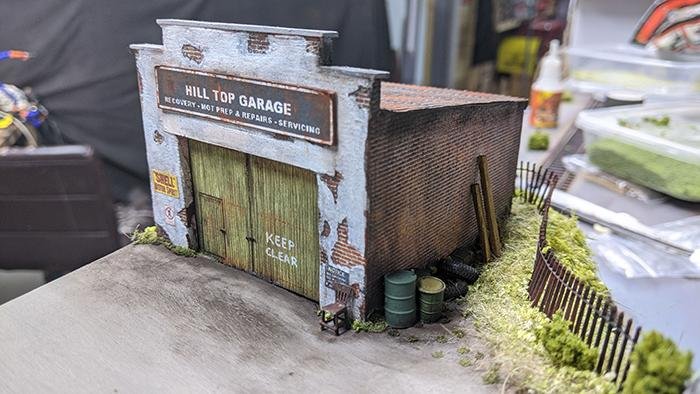
16. To provide a workshop on the top of the embankment I started by looking for an off- the-shelf building, but it became apparent there were few options, meaning I had to build my own. The full build guide for this workshop can be found here. The workshop was glued into place with a spot of superglue, after which I added clutter with old oil drums, tyres, bits of old fence and some lengths of timber.
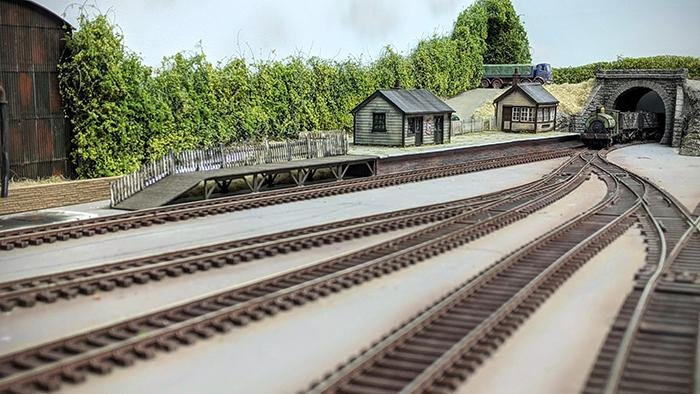
17. An overview of work so far in the station area. A cast iron fence has been added from Fair Price Models around the small garage leading down to the station, and a classic red telephone box has appeared. The hanging basket liner has now been improved with static grasses and flocks added.
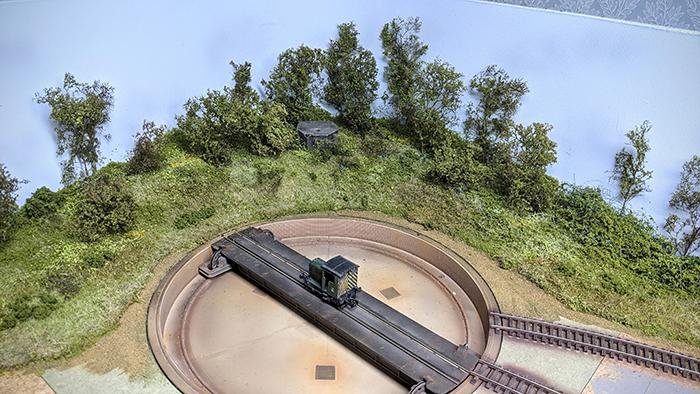
18. At the other end of the layout is the large turntable. Around it, this area will have woodland and dense shrubs. The embankment was created using foam with hanging basket liner added. War World Scenics layering spray is applied and then static grass is applied followed up by an array of scatters and flocks. With the ground cover complete, trees were added. Large trees at the rear of the wood scene and small trees at the front help to give a sense of depth and hide the pillbox under the years of undergrowth.
19. Grassy inlay areas followed, made of hanging basket liner with flock added. The edges of the grass are softened by spraying some Tamiya Flat Earth around them. A simple drainage ditch was cut into the underlay foamboard to give it some depth, lined with air dry clay in addition to the road surface leading up to the loading platform on the right and left to dry.
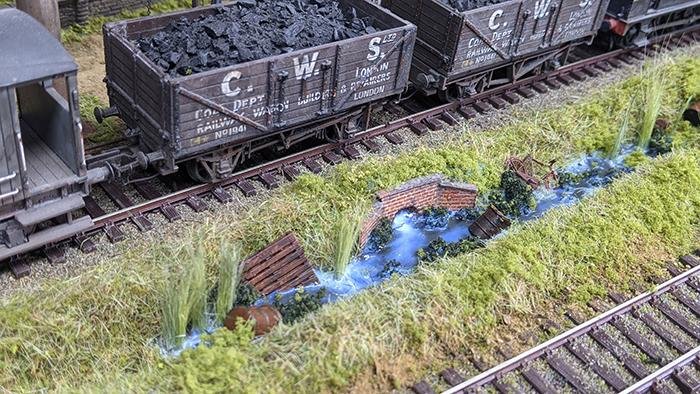
20. With the Das clay now dry, attention turned to detailing the scene. The base of the drainage ditch was painted with a base coat of dark green/ grey. I then added pallets, bicycles and barrels followed by clear PVA to create the water effect. It is still drying in this image.
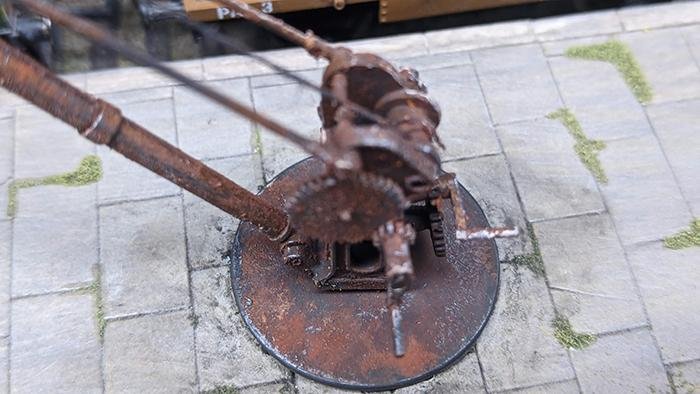
21. No loading platform would be right without a small loading crane. This crane from Gaugemaster fitted the bill. To paint it, I started by giving it a coat of Tamiya Hull Red with steel effects added using a Vallejo dark grey and some MIG Ammo Rusty Rail weathering powder. A pencil was rubbed on the edges to look like the crane is just about still operational.
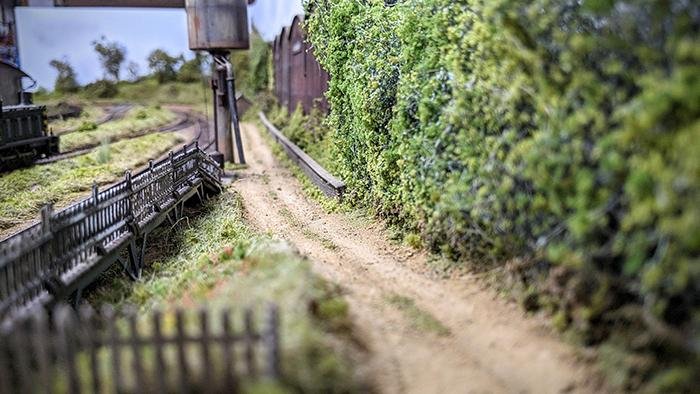
22. At the rear of the layout I added a small dirt track allowing lineside crew access to the line and permanent way hut.

23. To avoid the effect of the road bridge appearing as if it ran into the sky, I took a photograph of the road I lived on and inserted it through the tall high sided hedges to suggest the scene continuing.
24. At the coal yard, an Intentio coal staithes kit has been added, and the barrow crossing completed using Wills Wooden plank plastic sheets. More junk has been added to give the yard a run-down and neglected feel.
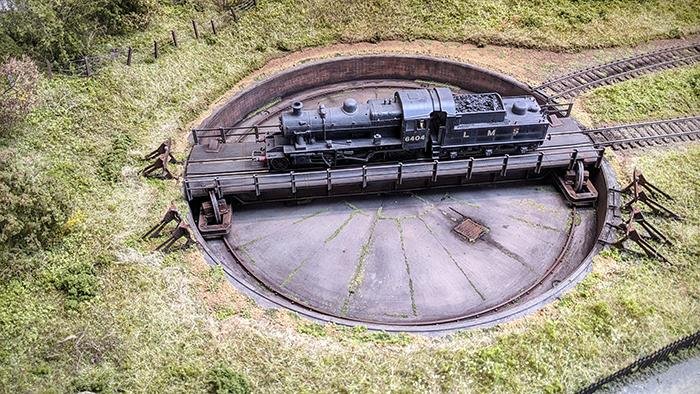
25. Repainting the turntable really helped transform that area, as did the addition of moss between the concrete joints around it. Bullhead rail buffer stops on the code 75 track complete the picture here.
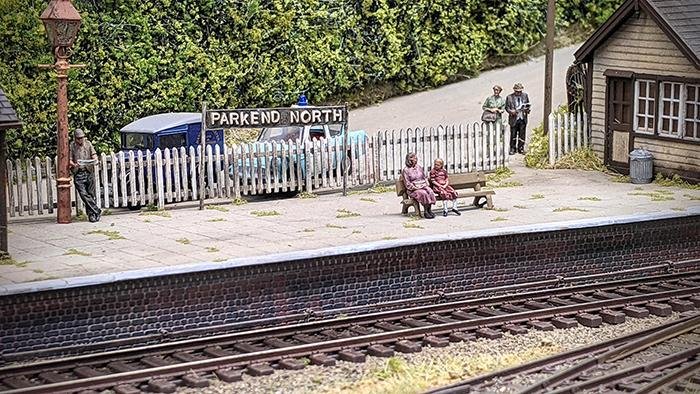
26. Adding the miniature population to the station together with vehicles and signage brings Parkend North to life. All figures are from the Modelu 3D printed range.
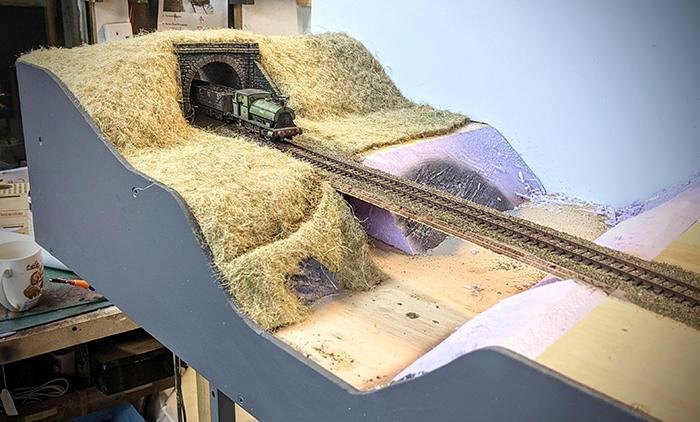
27. There was now an option to build a 2ft 6in extension to include a waterway with the rail crossing above. The basic scenic construction was foam to create the embankments trimmed with hanging basket liner.
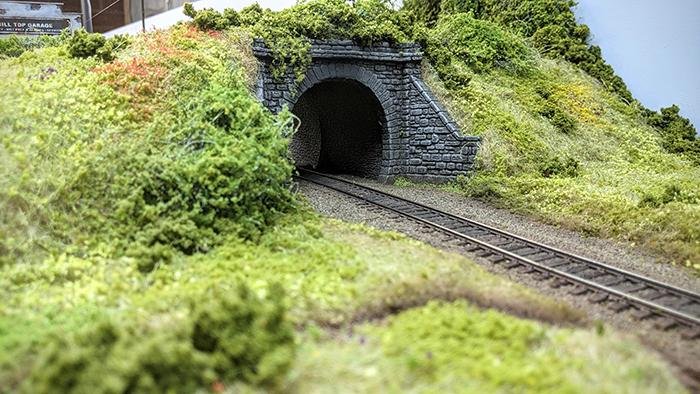
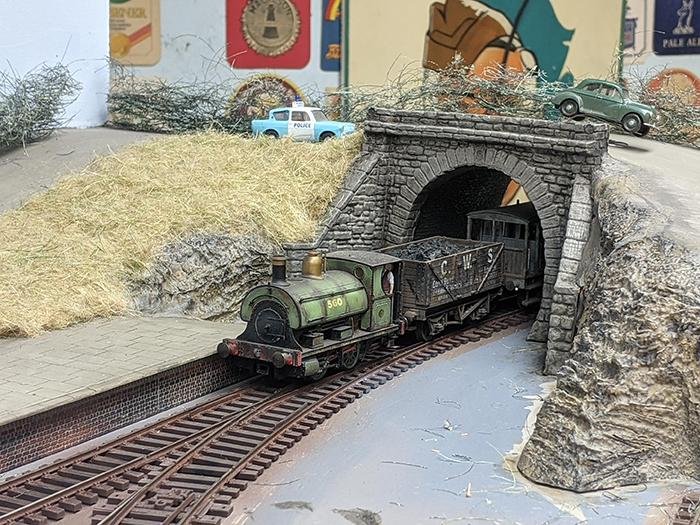
28. With the other Peco tunnel front added and weathered to match the station side, foliage was added around the embankment as the railway enters the new extension.
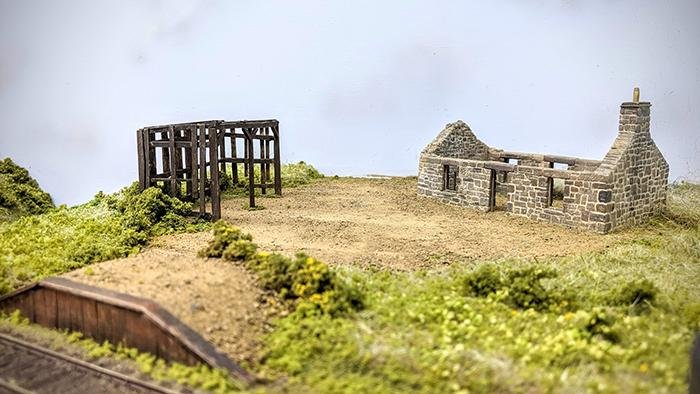
29. A derelict farm from Braeside Models helped to fill a spare area on the extension which also incorporates a small halt for farm workers.
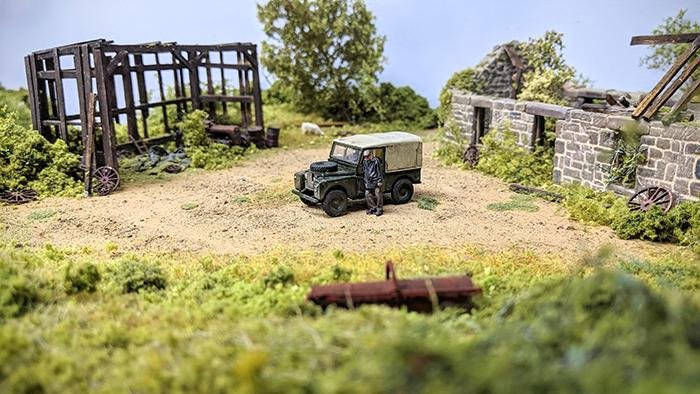
30. To finish the farm scene, I added wooden rafters to the roof of the Braeside cottage. I used the field roller from Scale Model Scenery and added a Series One Land Rover from Oxford Diecast. Tucked away in the barn is an old tractor rusting away.
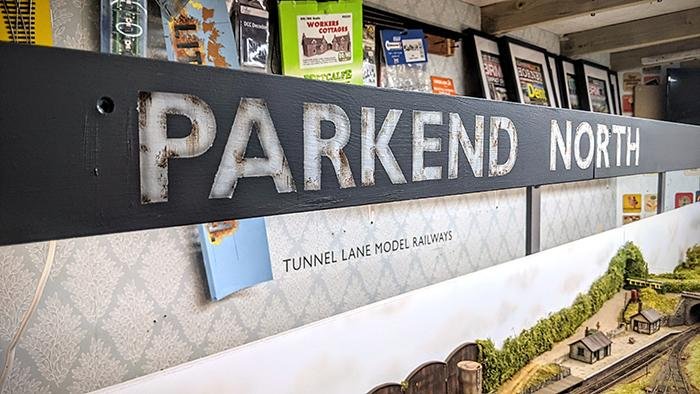
31. Almost right at the end of this build it was decided to add lighting, so a lighting pelmet was designed. LED under-counter lighting was used as this gives a nice warm light. A layout name plate was produced using a stencil and white paint. I wanted the Parkend North name plate to suit the theme of the layout, so I decided to add some signs of ageing to it with rust spots.
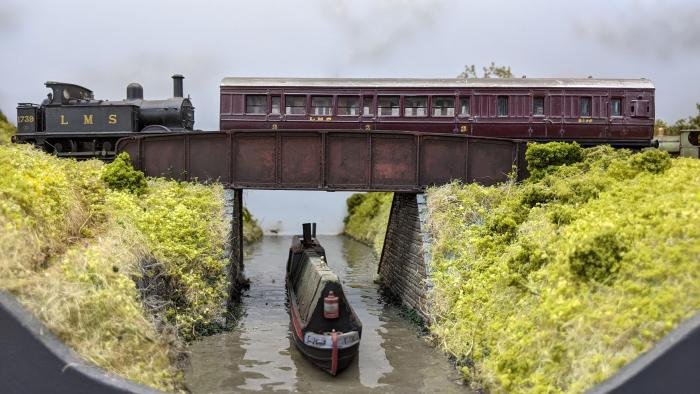
32. The canal section was a fun part to create. While the clear PVA over the base coat was drying, I added a Skytrex narrowboat. I built the bridge using some Peco steel girders and some stone plastic card sheet. The girders were painted Tamiya Hull Red and finished off using weathering powders.
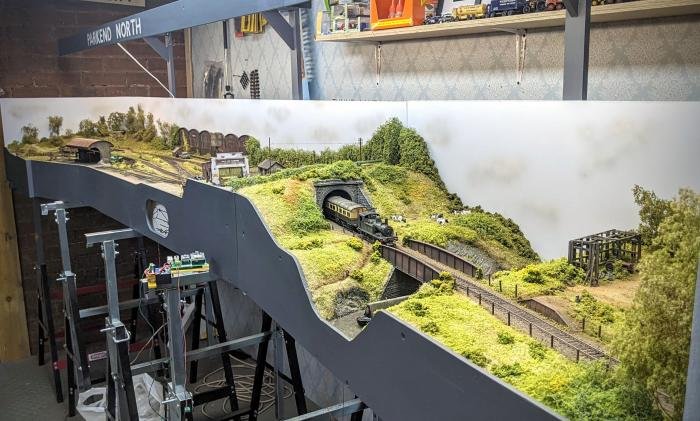
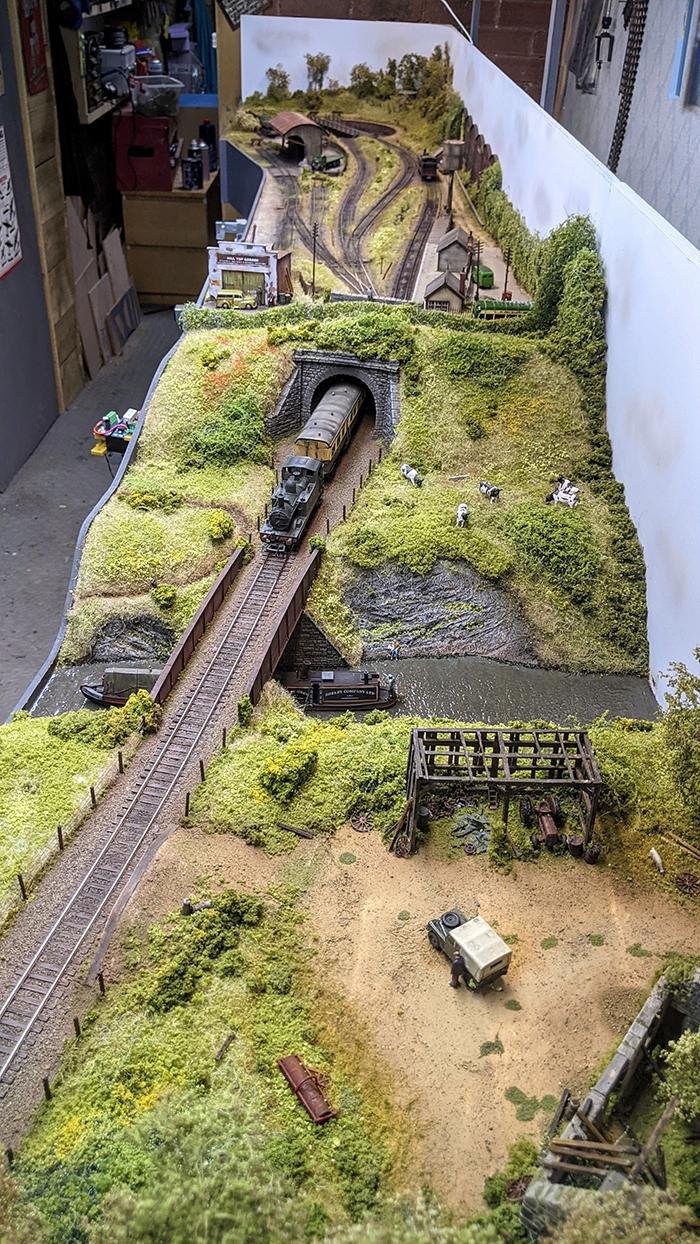
Above: Parkend North models a freelance Forest of Dean branch line terminus in the steam era. A classic GWR autotrain emerges from the road bridge at the centre of the layout as it heads along the branch towards the storage yard.