Playing Card Deck Design Tips
Overview
Designing a playing card deck has always been one of those bucket list items for me. Playing cards can be relatively expensive and require lots of time (and artwork) to see the project through. After releasing two decks from two different printing providers, here are some tips and helpful links to get your deck idea off the ground.
Deck Art
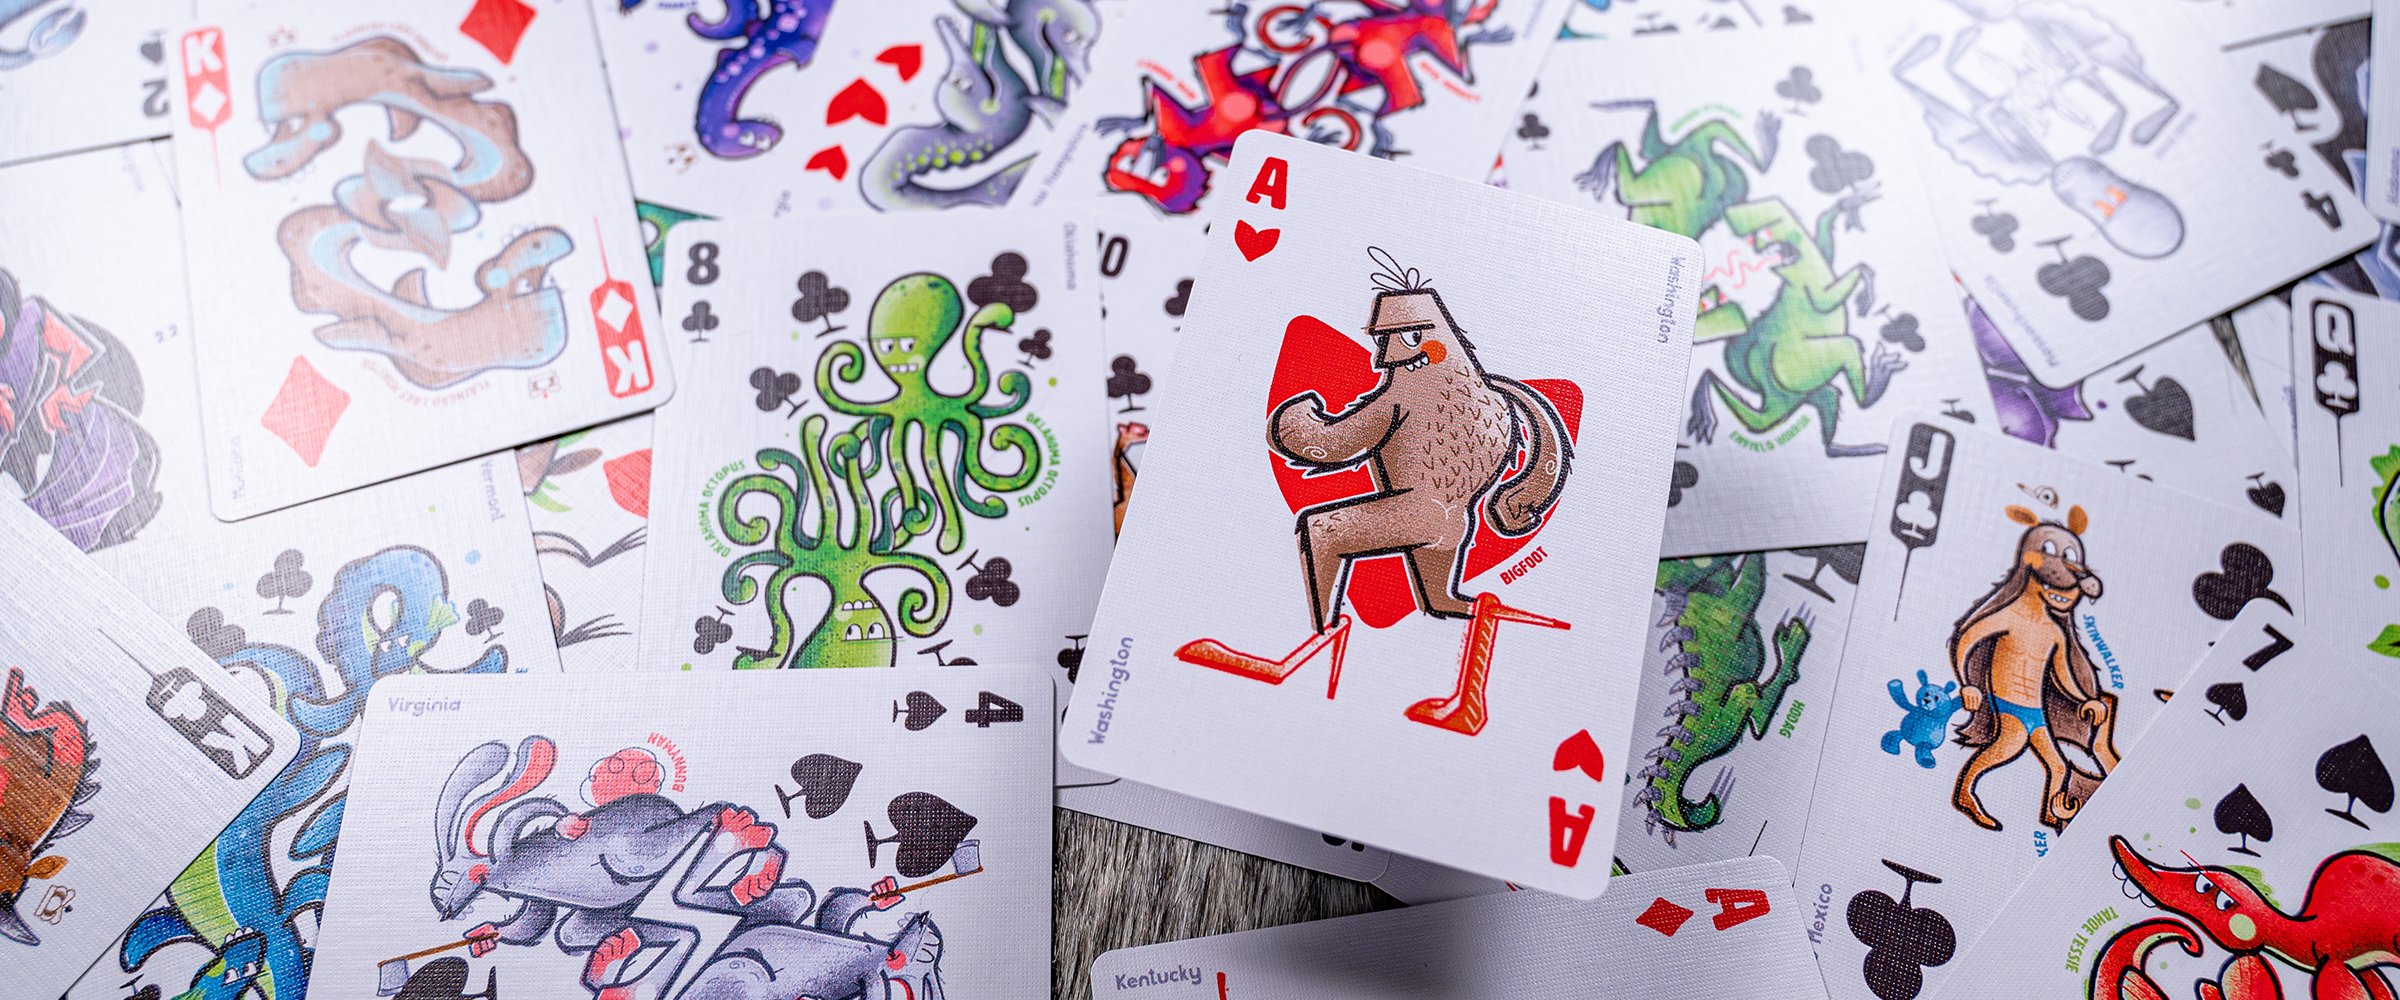
If you’re going for a full deck design (and you should 😉🃏) be ready to roll up your sleeves because you’ll need enough artwork for 54 cards (40 numbered cards, 12 court cards, 2 jokers), a card back, and a design for the tuck box. Consider following a theme or common art style, including unique pips ♠️♥️♣️♦️and custom typography to complement the artwork.
Enjoy some of my favorite decks to get your creative juices going:
Animal Kingdom (Theory11)
Harry Potter (Theory11)
Star Wars (Theory11)
Odd Fellows (Stockholm17)
Eye of the Ocean (Stockholm17)
House of the Rising Spade (Stockholm17)
Circuit Board PCB (Elephant Playing Cards)
Camera Cheat Sheet (The Coolector)
CMYK (Hundred Million)
Design Deck, Font Deck, Beer Deck and more 😉 (Forrest Goods)
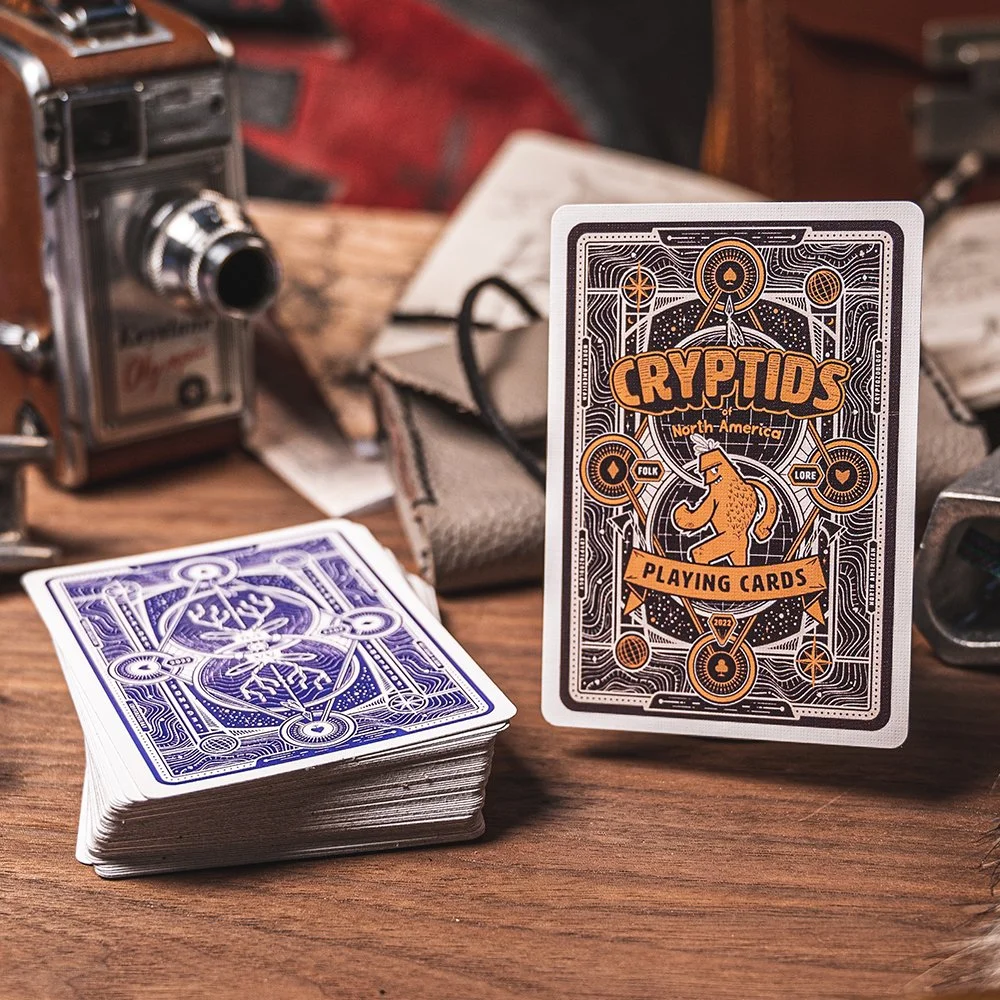
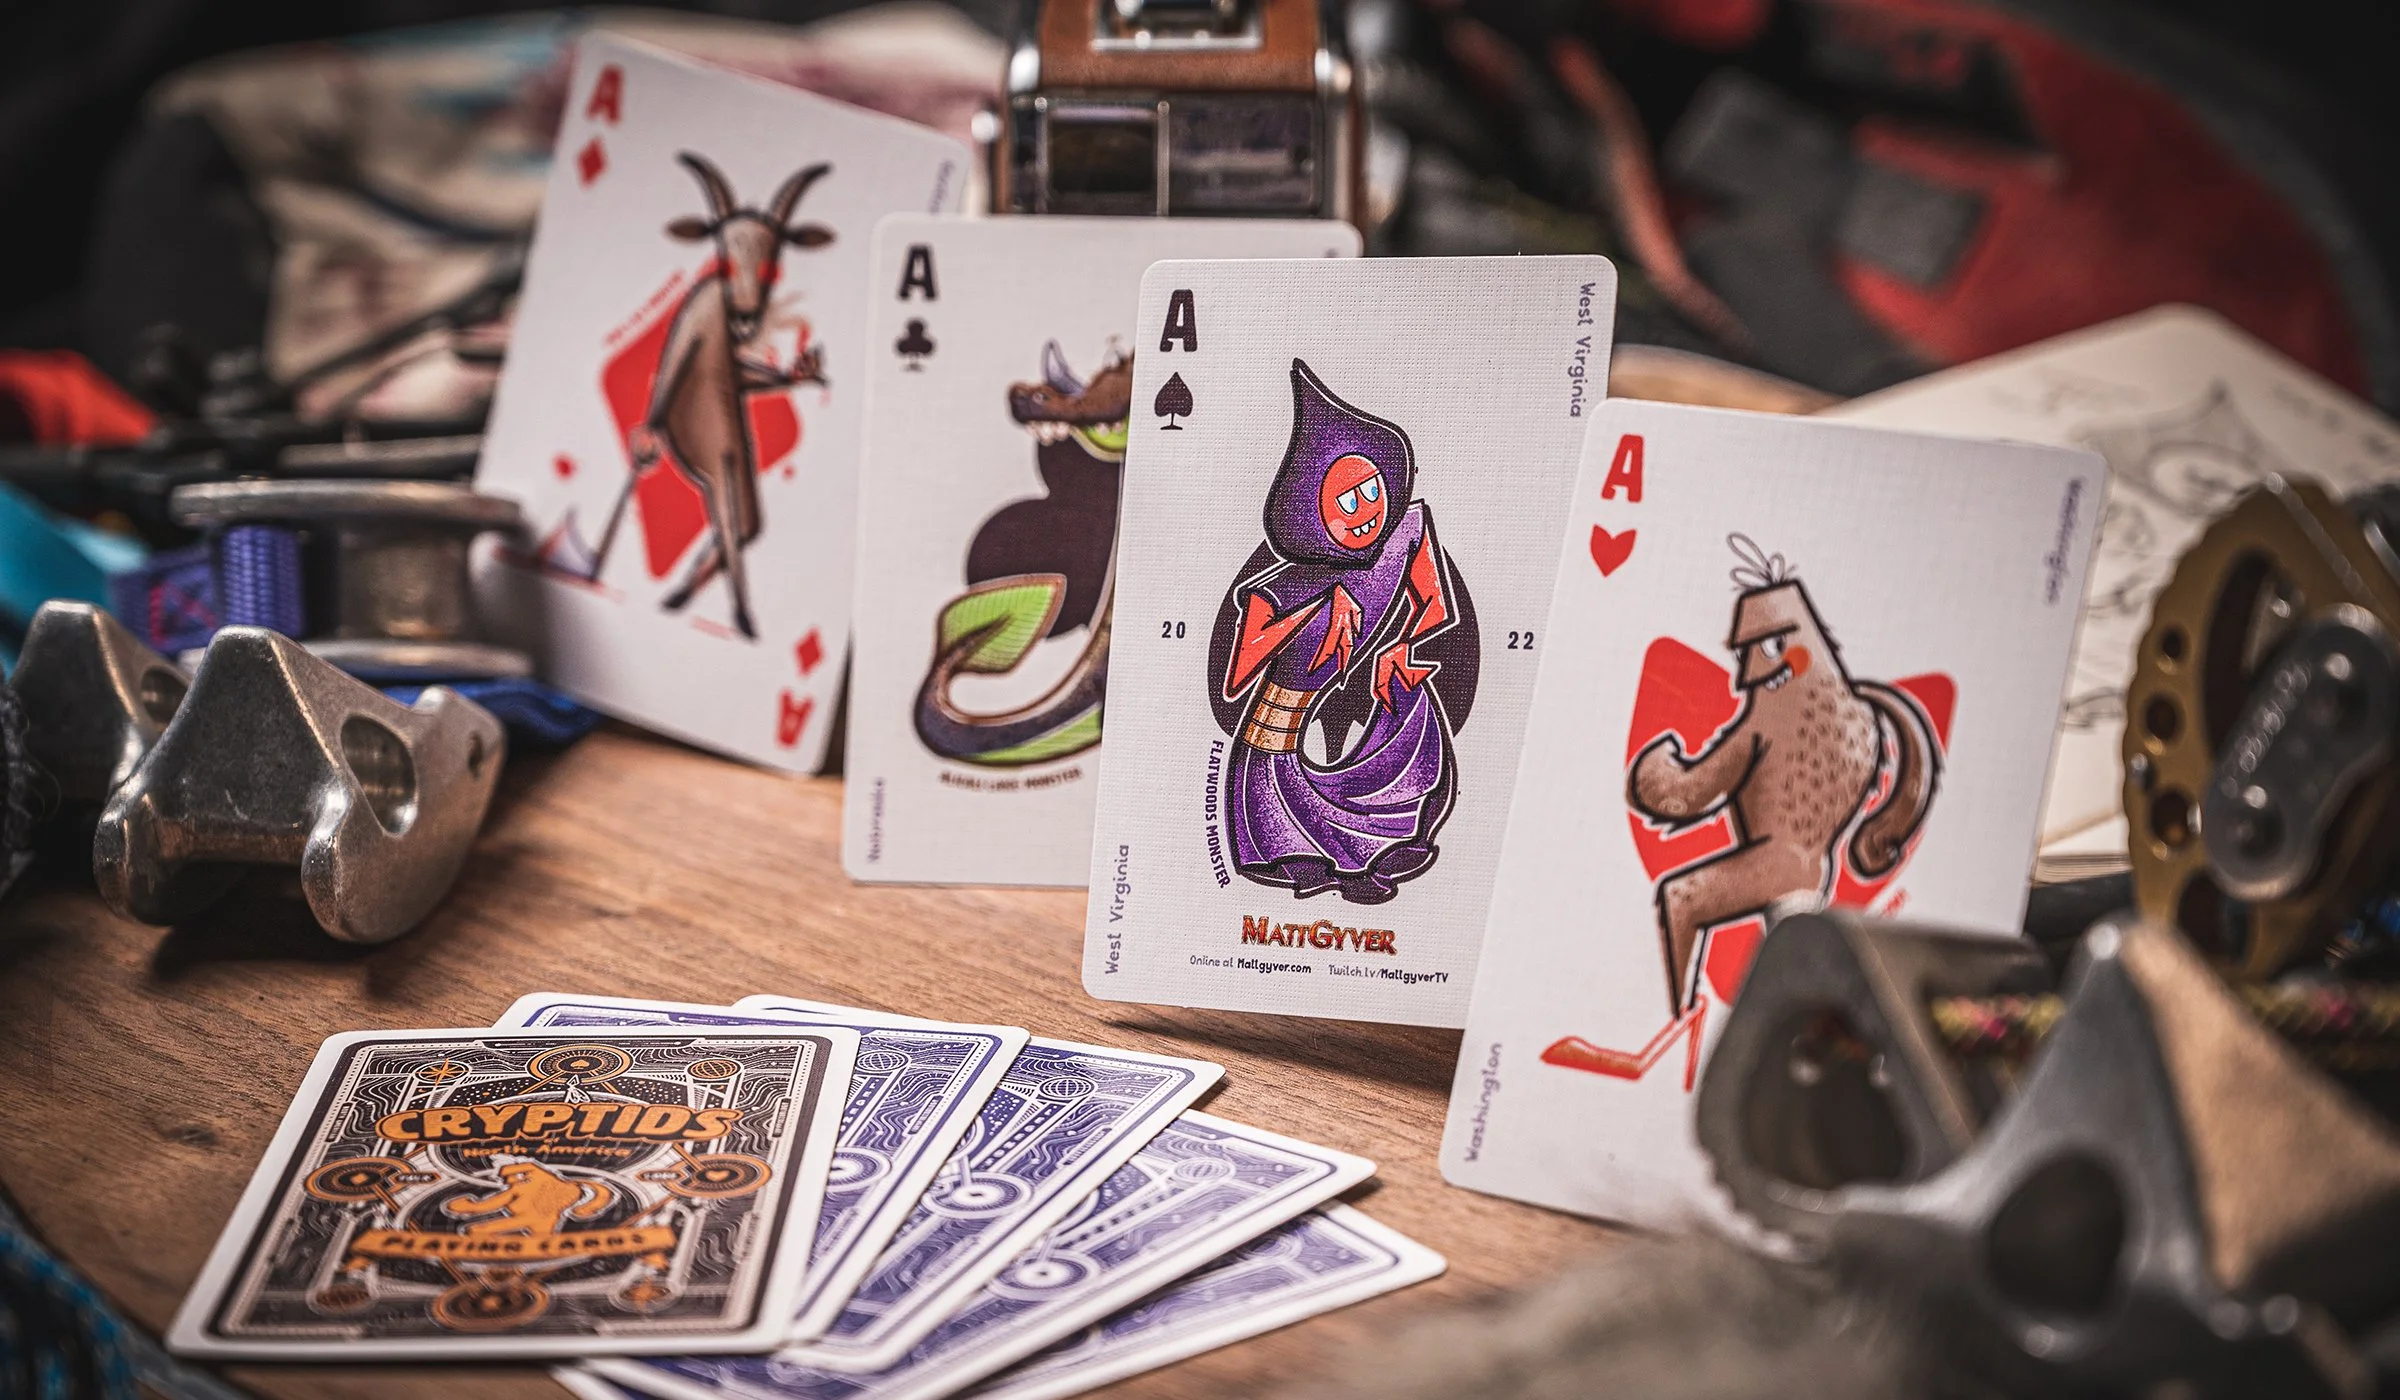
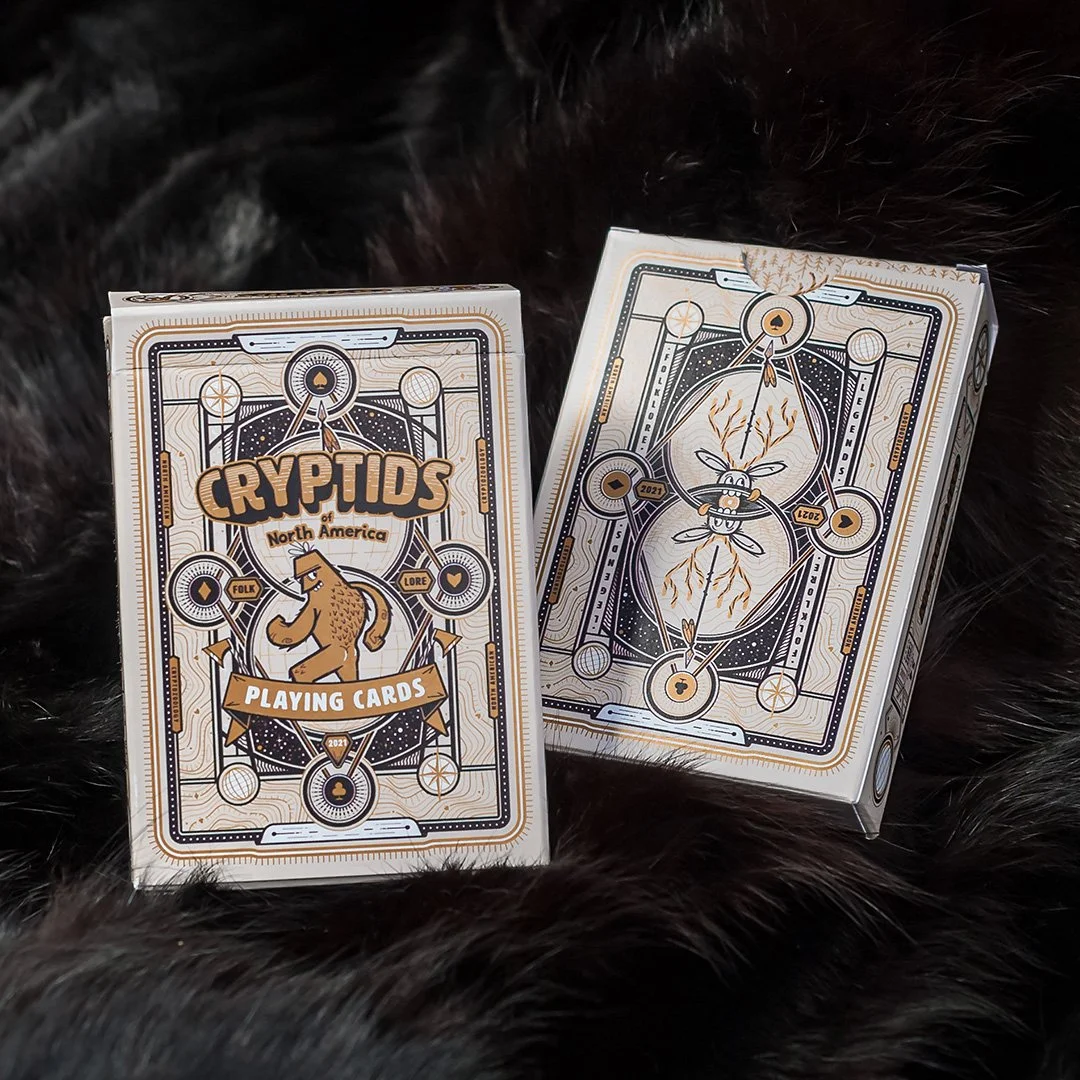
Cryptids of North America Poker Deck
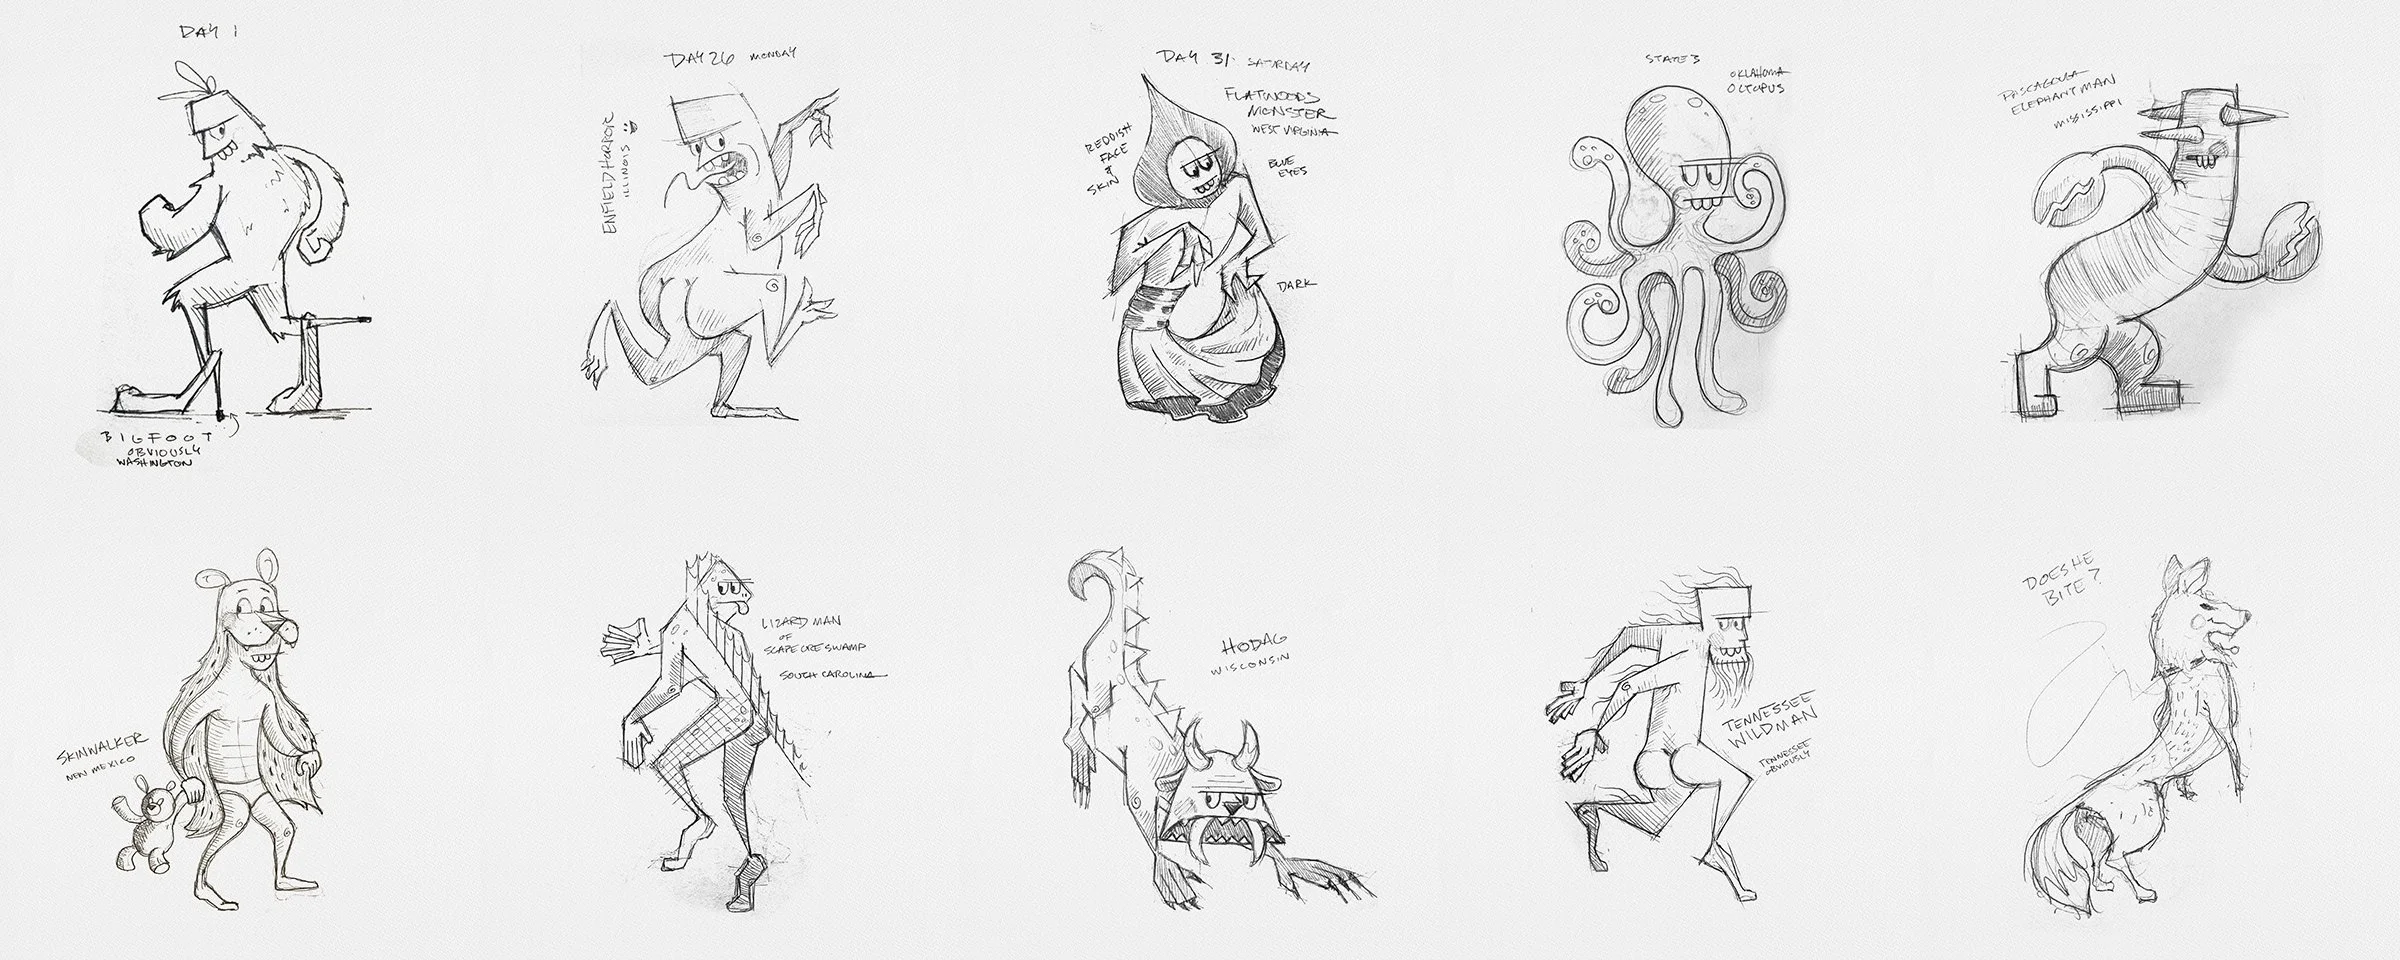
Since I had an abundance of cryptid illustrations from the last couple Inktobers, I decided to work these into a Cryptids of North America poker deck. All of my ideas begin as sketches – these should work nicely:
All the sketches were imported into Adobe Illustrator and vectored by hand using a small assortment of brushes, textures, and colors. Since this will be a printed product I’ll be working exclusively in CMYK. Making art in Illustrator is my bag, baby, because I can later scale these up for tarot cards, t-shirts, posters, and more.


Rotated Symmetry
One of the more challenging (and fun) aspects of playing card design is creating the rotated symmetry. It elevates a deck beyond a simple gallery of art into something more thoughtful and playing card-like; there is no upside-down and no wrong way to hold the card. For my cryptid deck every card except the aces and jokers will have rotated symmetry.

Directional
Rotated symmetry
To begin, each character is exported from illustrator as a large 600dpi transparent PNG and opened in Adobe Photoshop for some quick editing. Printing requires artwork to be at least 300dpi, so I export big just to be safe.
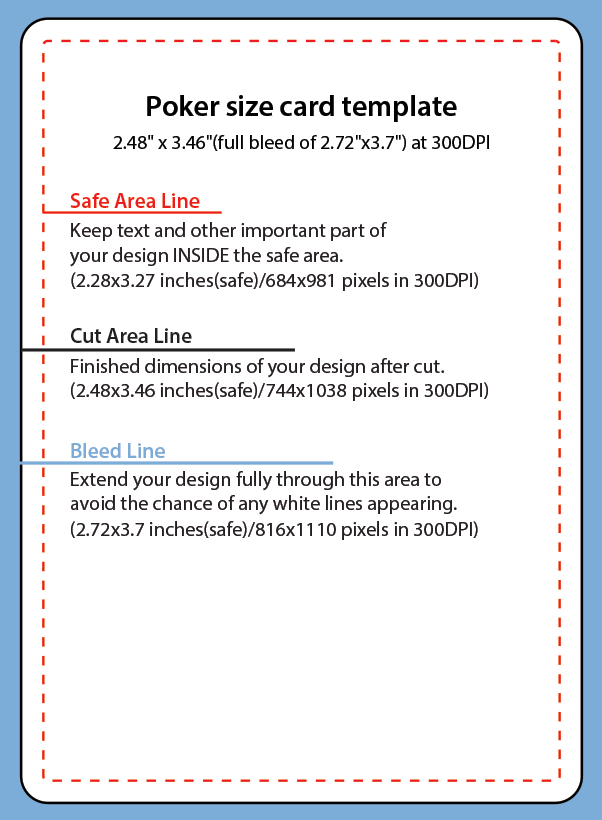
You’ll want to grab a playing card template from your chosen printer to help set up your card document (see the Deck Preparation section below).
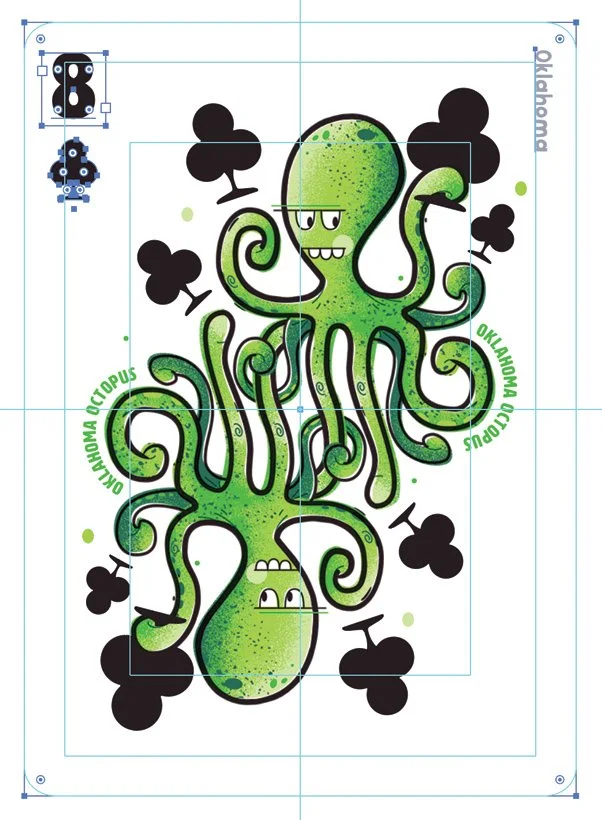
With the PNG open in Photoshop, duplicate the artwork layer (Ctrl+j or ⌘+j) and rotate the new layer 180˚ with Edit > Free Transform (Ctrl+t or ⌘+t) while holding shift to constrain the rotation to 45˚ increments. Arrange the two layers so they overlap in an agreeable fashion and generally fit the playing card template. Be sure to leave room for the pips ♣️.
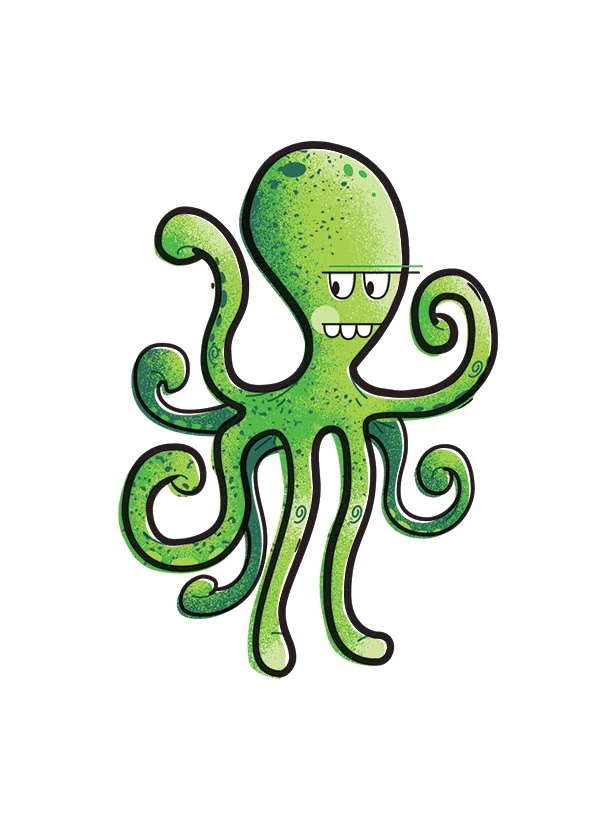
Initial illustration
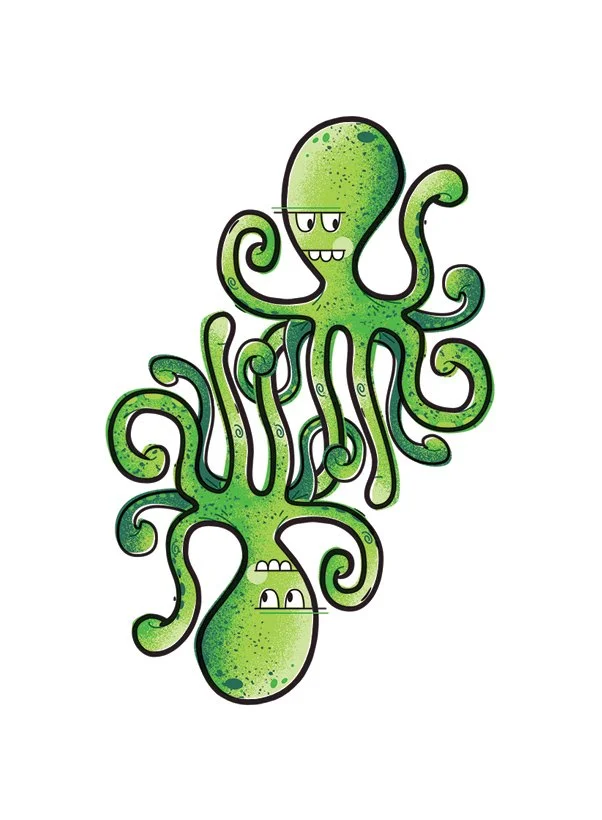
Illustration duplicated and rotated in Photoshop
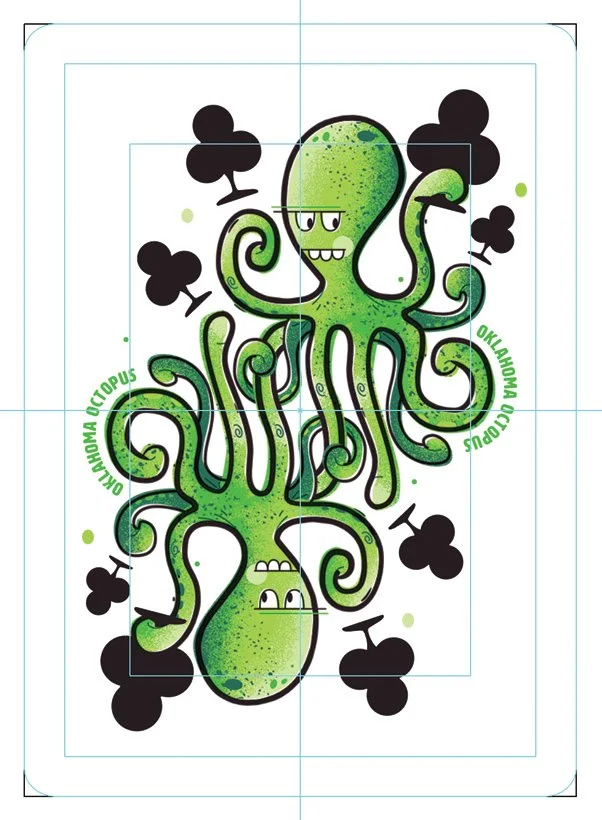
Illustration placed in Illustrator and type/pips added
Once rotated, I used small layer masks and some simple copy/pasting to overlap the tentacles and weave things together. I’ve also set up a few guides to help me size and place everything – there are 54 cards, so consistency is very important. The Photoshop file looks like this:

Photoshop layer setup
Minor typography and pips can also be added at this point, but I find it better to add those final touches in Illustrator – we’re heading back there anyway to lay out the deck.
Before saving the file, put each multi-layer illustration into a folder/group in Photoshop and center it. Delicious centered symmetry! When the artwork looks good, save each card as its own high-resolution flat 300dpi or 600dpi CMYK TIF file (a PNG also works fine, I’m old-fashioned). This is the finished card art that will be imported into our Illustrator deck master file.
I wound up with more than 75 TIF files. The additional variants will give me some flexibility in Illustrator when placing the pips.
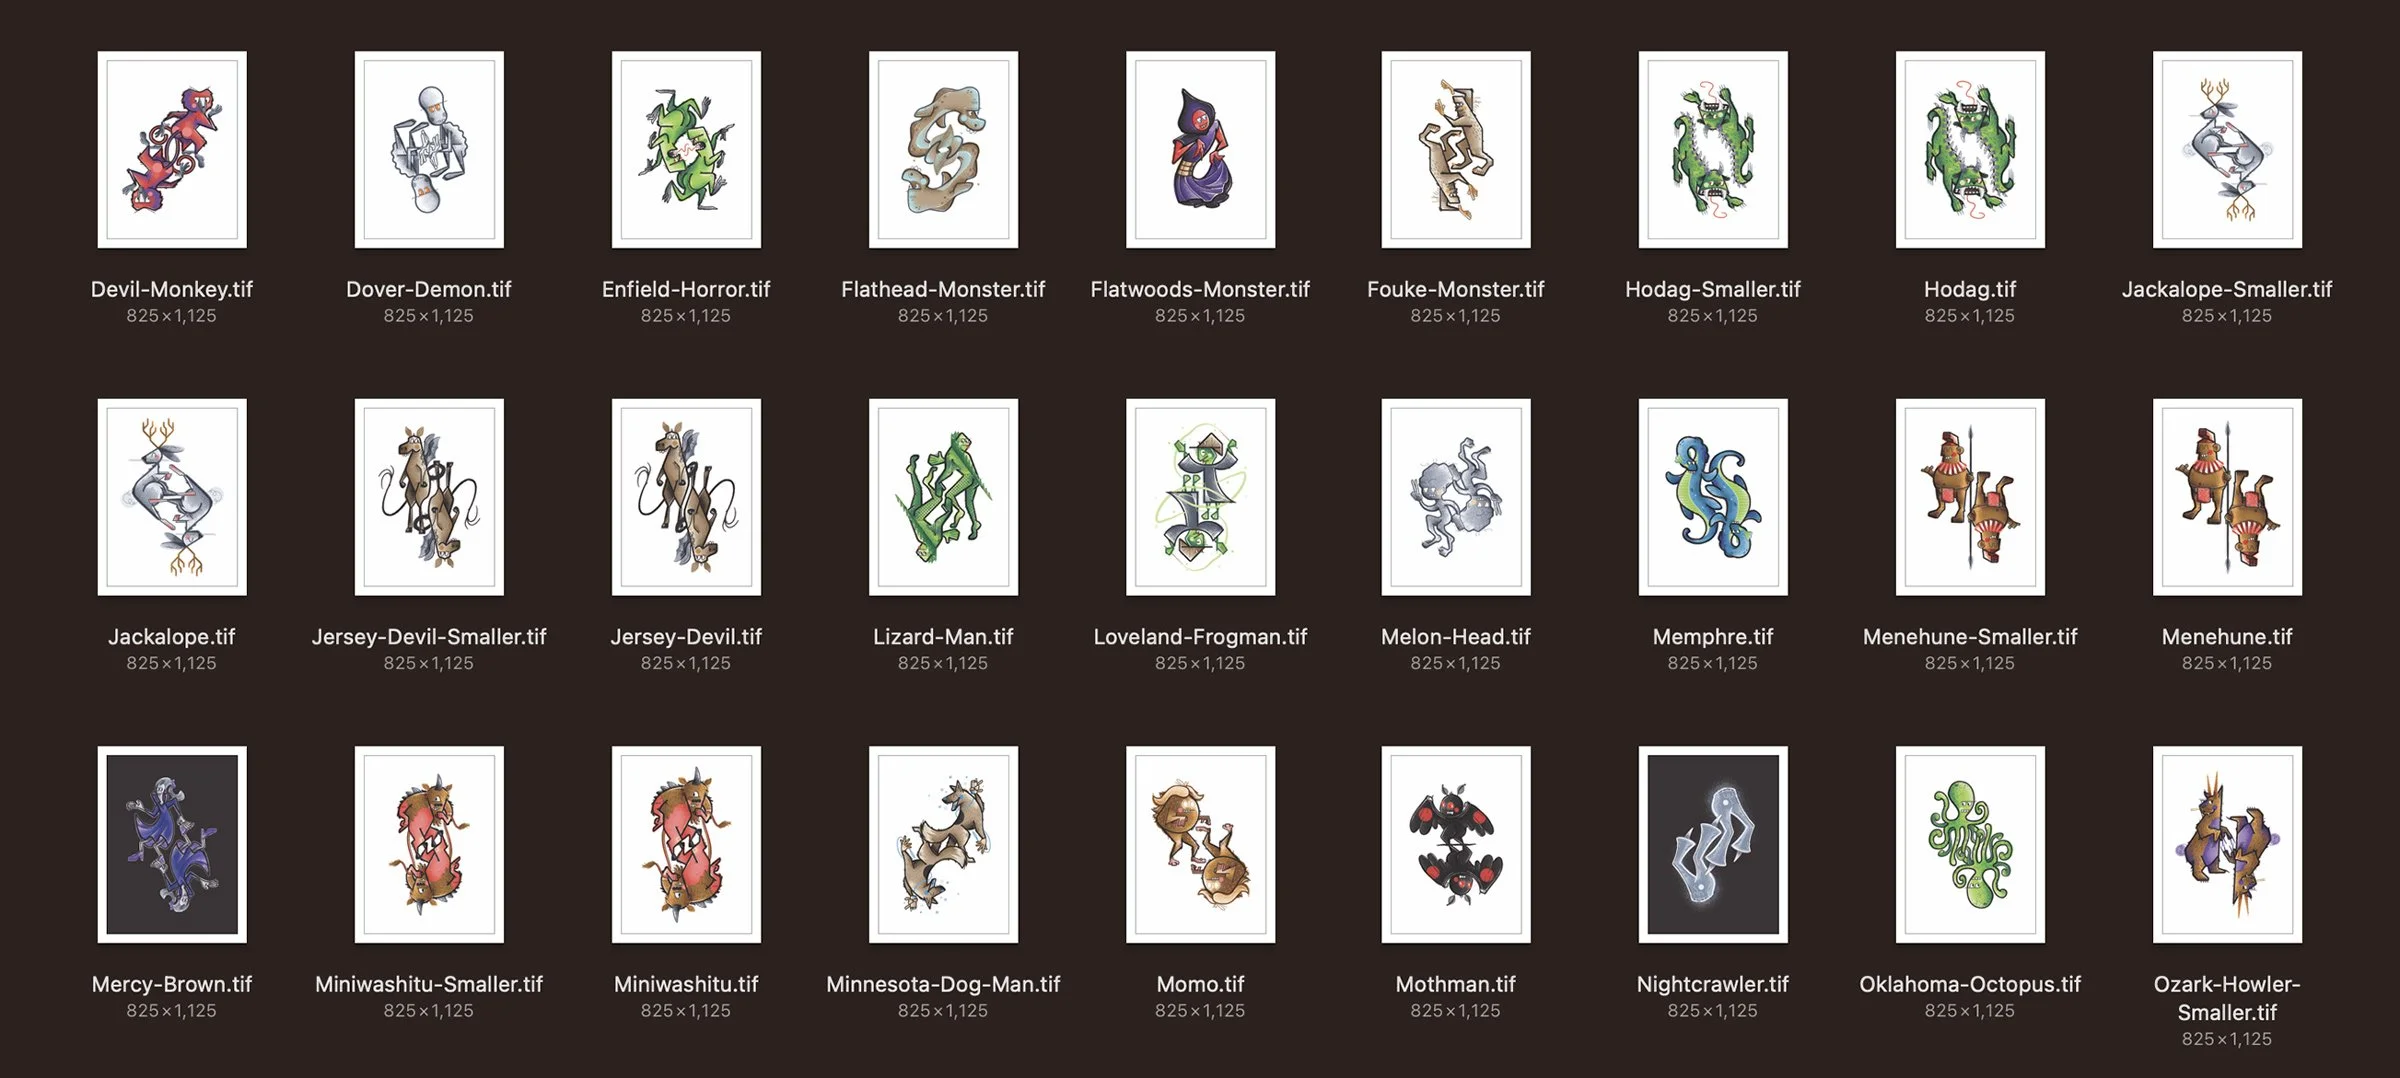
A sampling of the TIF images from Photoshop to be imported into Illustrator
Note: The reason I don’t do all this [gestures wildly at everything] in Illustrator is because each character’s vector file is 30MB+. All the textures and grain brushes have a tendency to… crash things. It’s far simpler to save as a PNG, edit and rotate in Photoshop, save as a TIF, and only deal with the art as linked files in Illustrator. ALL of my cards needed to be in one file. You’ll see. It’s scary. 🃏🔥
Deck Preparation
Back to the comfort of Illustrator’s warm bosom. I’ve created a new document with 54 art boards, all sized according to the print vendor’s card template specifications. Each TIF file is imported and placed onto its own art board using File > Place… (linked), being careful to make sure each is perfectly centered. If you didn’t properly center the card art in Photoshop, you’ll have a lopsided card; the center point won’t be in the correct place.
Sometimes a deck will come with 55 cards (sometimes a gaff or trick card); I’ve decided to duplicate the cover design for my cryptid deck, but I’ve also seen blank cards, a 3rd joker, a red spade or black heart, game instructions, or even two backs—get creative.


After everything is imported into Illustrator it’s time for the graphic design bits: placing the pips, assigning the suits, typography, and other finishing touches.
The pips are arranged playfully on top of my character art whenever possible. Once the top pips are positioned, it’s quick and easy to Copy > Paste in Front (Ctrl+f or ⌘+f), and rotate those new pips to the bottom using the center of the card as the axis point. For odd numbered cards, some minor adjustments should be made to the lower pip positions—asymmetry is fine here—as long as it feels balanced. With the TIF centered properly and all the guides aligned correctly, this works a treat.
A little masking was necessary to give the illusion of the character holding one of the clubs.
Note: The reason I don’t add the pips or lettering in Photoshop is to save myself the headache of switching between programs when making small adjustments to pip positioning, suits, and type. Photoshop is really only needed for the high-res TIF art itself, not so much the graphic design elements. The round-tripping to Photoshop would get tedious if I wanted to simply nudge the type on each card, or downright awful if I needed to change the card order or values.

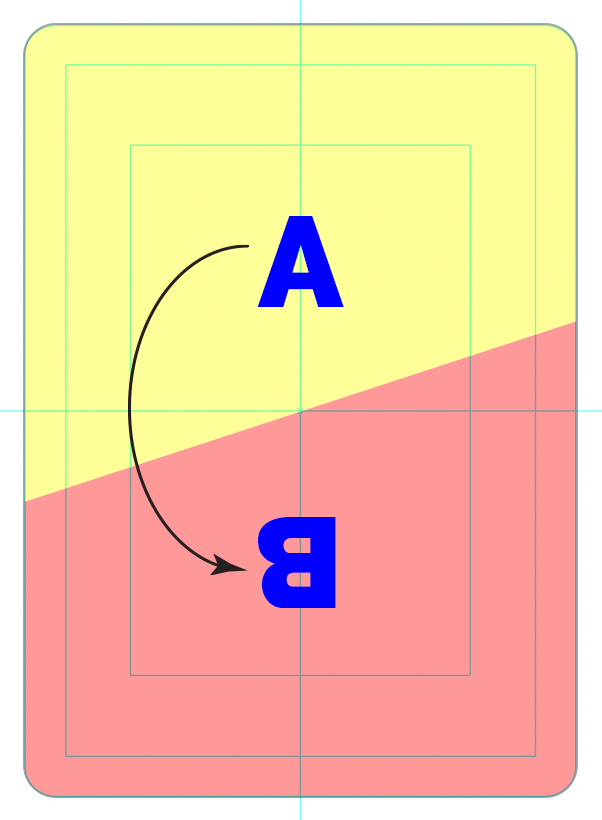
The custom typography and numbers/suits are added in the same fashion as the pips. But rather than repeating the manual process above, there’s a quick shortcut to automate the symmetry.
Place all the text and elements on the top half of the card, add a large transparent rectangle centered around the card, and group these elements together. With the group selected, open the Appearance panel and add a new Transform Effect > Rotate Angle: 180˚ and Copies: 1. This will duplicate the top and rotate it to the bottom based on the card’s center point.
Before the transform effect
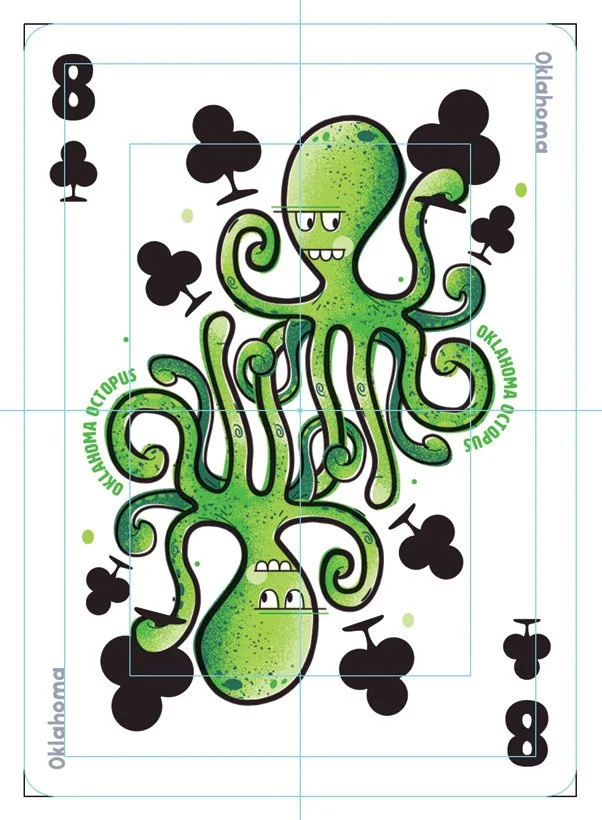
After the transform effect
This is a time saver when making future adjustments. By nudging the top elements inside the group, it’s guaranteed that the bottom elements will always be positioned correctly. The finished Illustrator file looks like this:

Card Margins
Depending on the safe area and bleed specifications of the card manufacturer, I find it best to have the suit numbers/values as close to the edge as possible. This helps reduce how much the cards have to be spread apart in one’s hand. Tighter margins mean less hand fatigue and better readability/playability.
Consider the difference between the 2021 brown deck (below: top left, top right) and the 2022 blue deck. Notice how far apart the cards must be in order to identify them, whereas the new deck is nice and compact with more noticeable court card values.
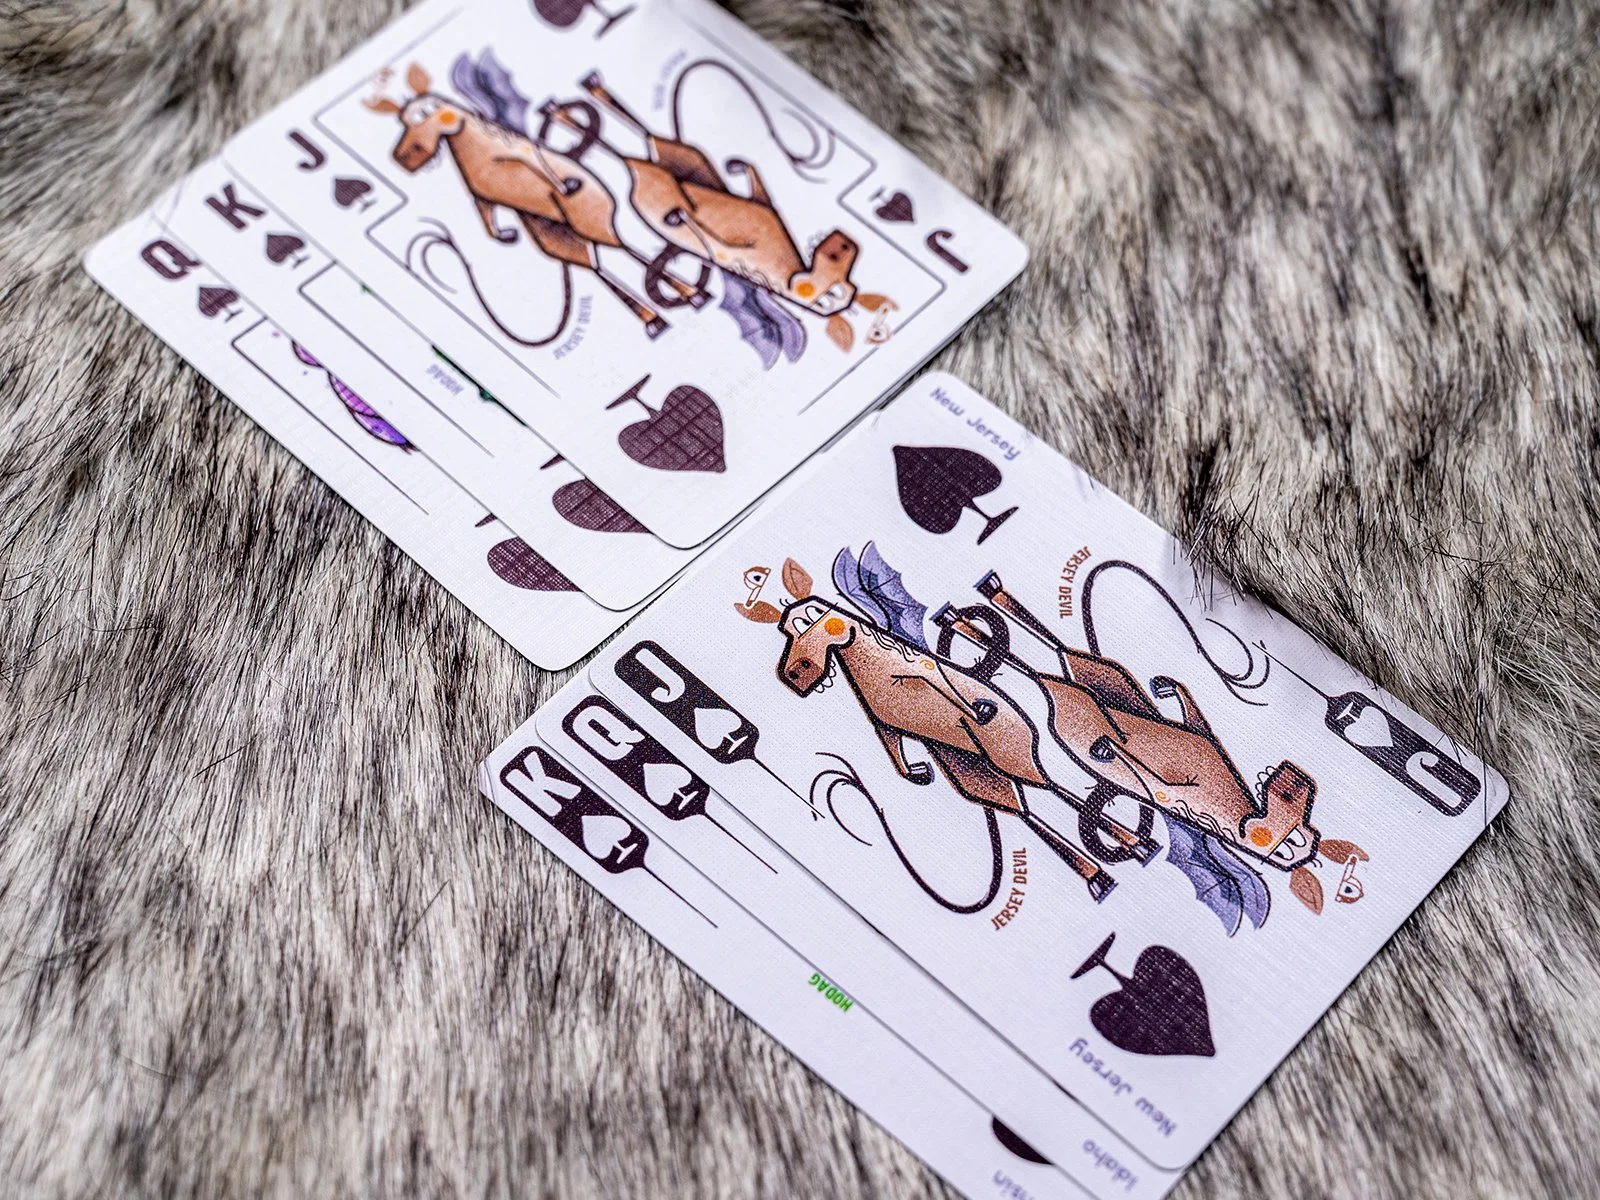
2021 loose margins (top left) vs. 2022 tight margins.
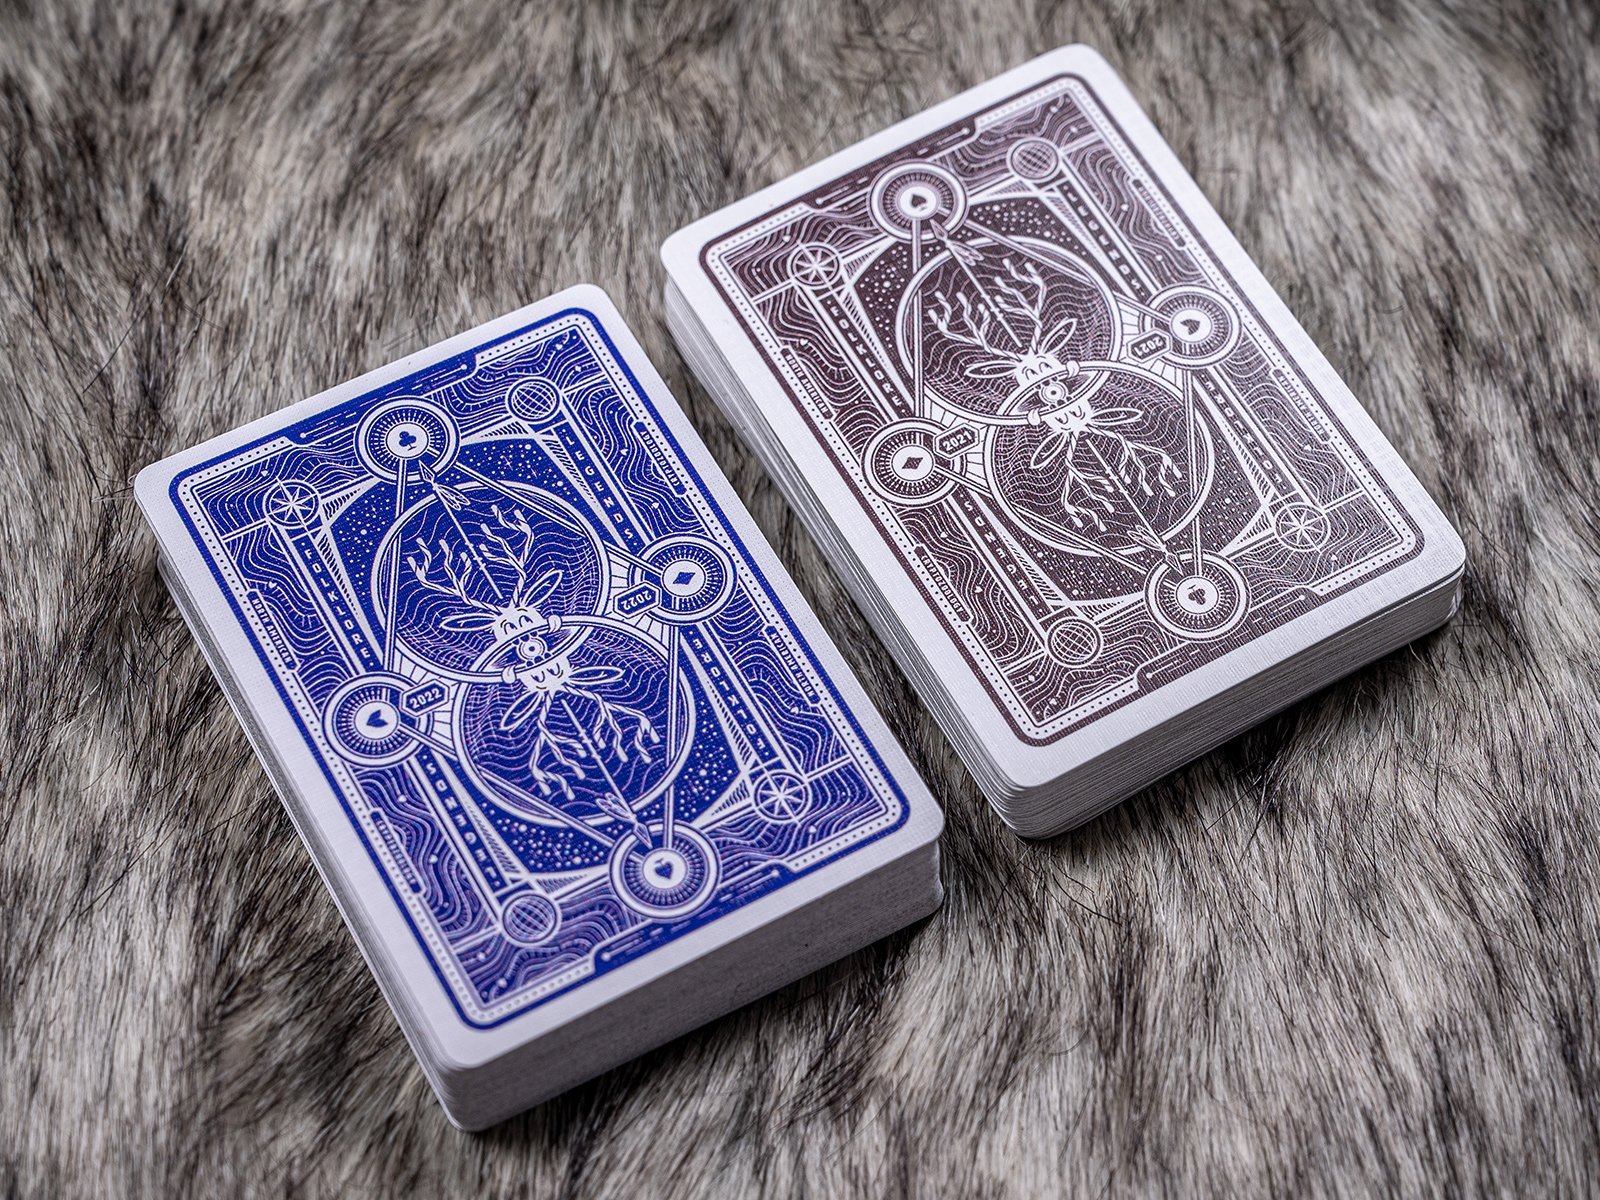
2021 loose margins (top right) vs. 2022 tight margins.
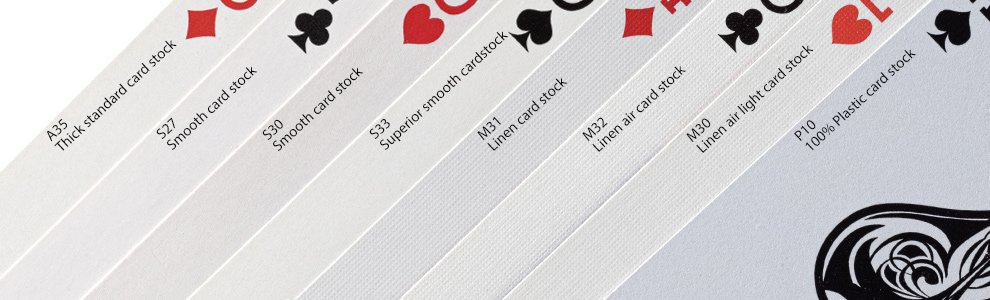
Card Stock
Playability and card handling is king, so my budget always starts by choosing the best card stock available. There are several styles and weights to choose from, but I recommend at least M31 linen stock (commonly found in Las Vegas casinos) because it has an amazing feel, and the linen texture has little air pockets that allow the cards to shuffle and slide easily. The difference between smooth stock and linen stock is very noticeable.
If you intend to order over 1000 decks (maybe you’re running a Kickstarter or stocking inventory), the extra sexy premium linen air and lightweight stocks are a worthwhile upgrade. Plastic cards, though waterproof, have a weird feel IMO and I rarely play with these decks.
Card Manufacturers
Many of the ultra luxurious playing card and tarot projects seen on Kickstarter, Theory11, Stockholm17, Playing Card Decks, and others are produced by these four companies:
Make Playing Cards (new personal favorite; small orders are ok)
Stay away from “custom playing card” junk like 4 Imprint, Zazzle, and Shutterfly unless all you need is to slap a logo on a deck and care nothing about quality. They use something like bargain S27 smooth card stock and only the card back can be customized. It’s the kind of garbage you’ll find in a coffee table drawer while on vacation at the beach. See exhibit A.
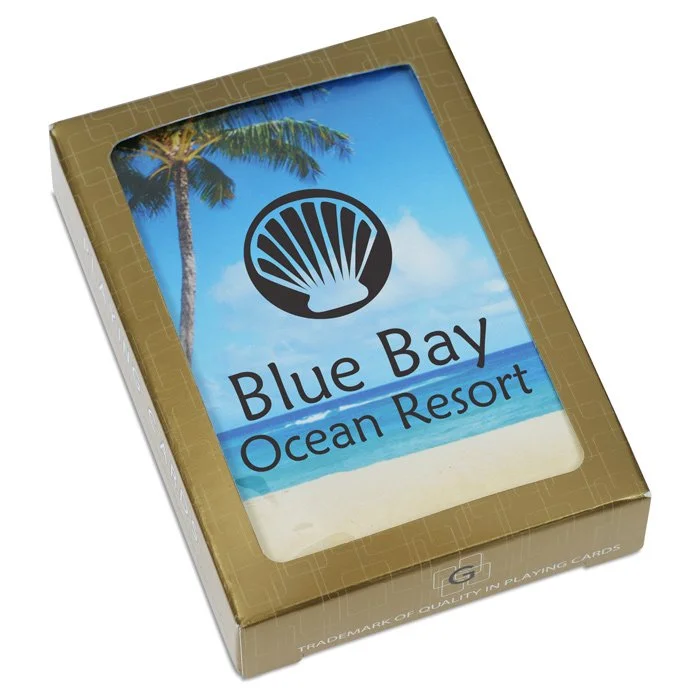
Exhibit A
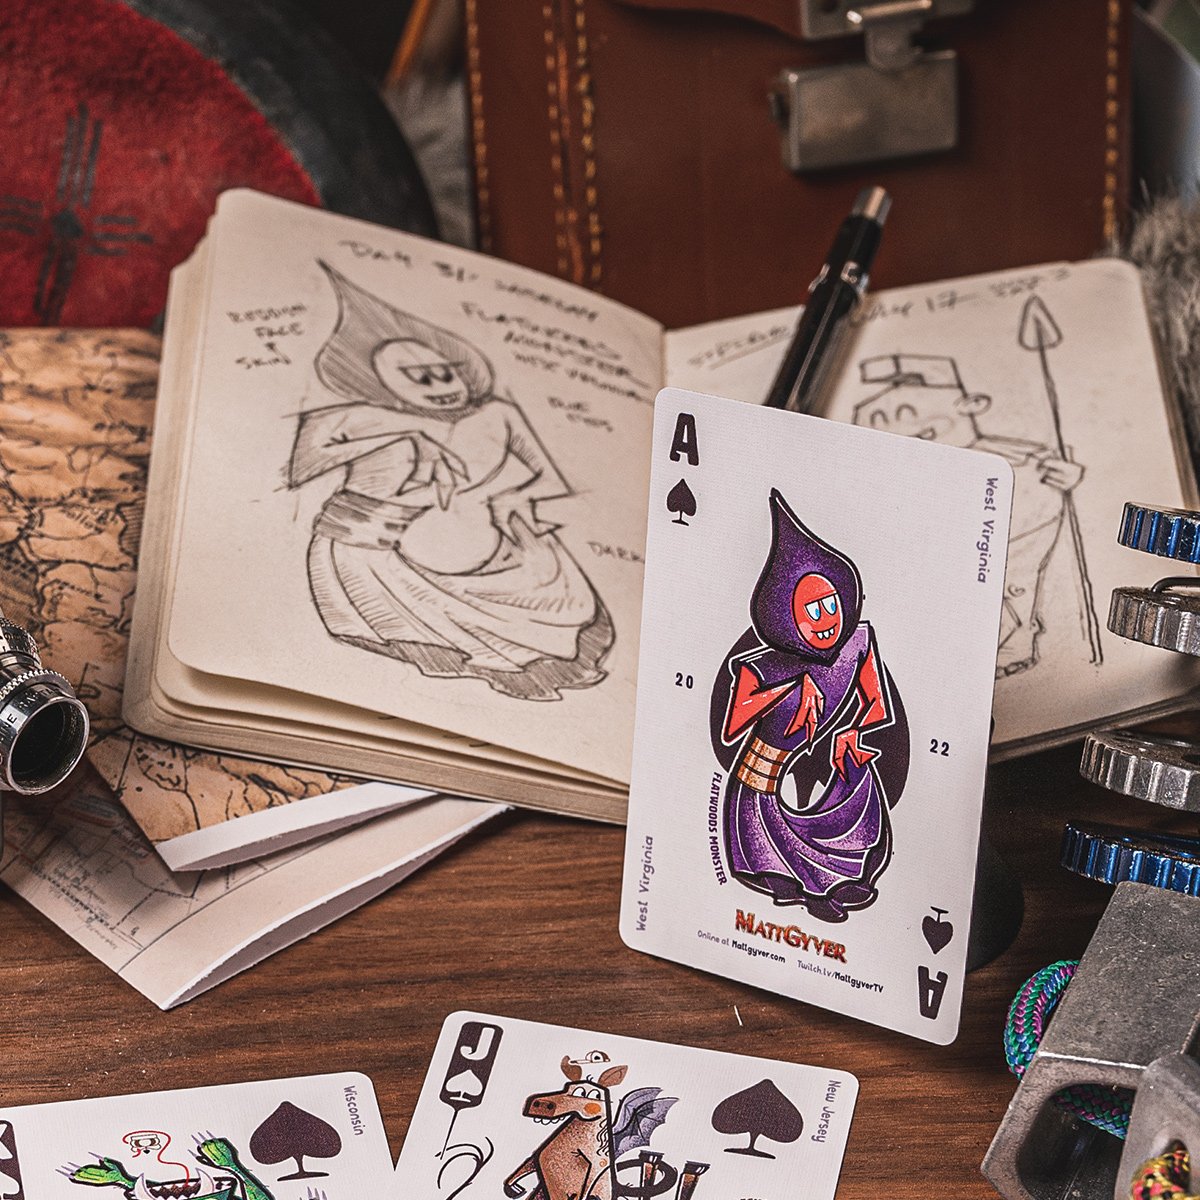
The 2022 Cryptids of North America deck uses the M31 linen stock with an extra slippery BETA finish from Make Playing Cards. Despite MPC’s dated website and not-quite-modern deck building UI, the results are amazing. Notably they allow small orders of 1-5 decks(!) which is perfect for simply prototyping your deck to test play or photograph for Kickstarter campaigns and buy-in from partners/investors.


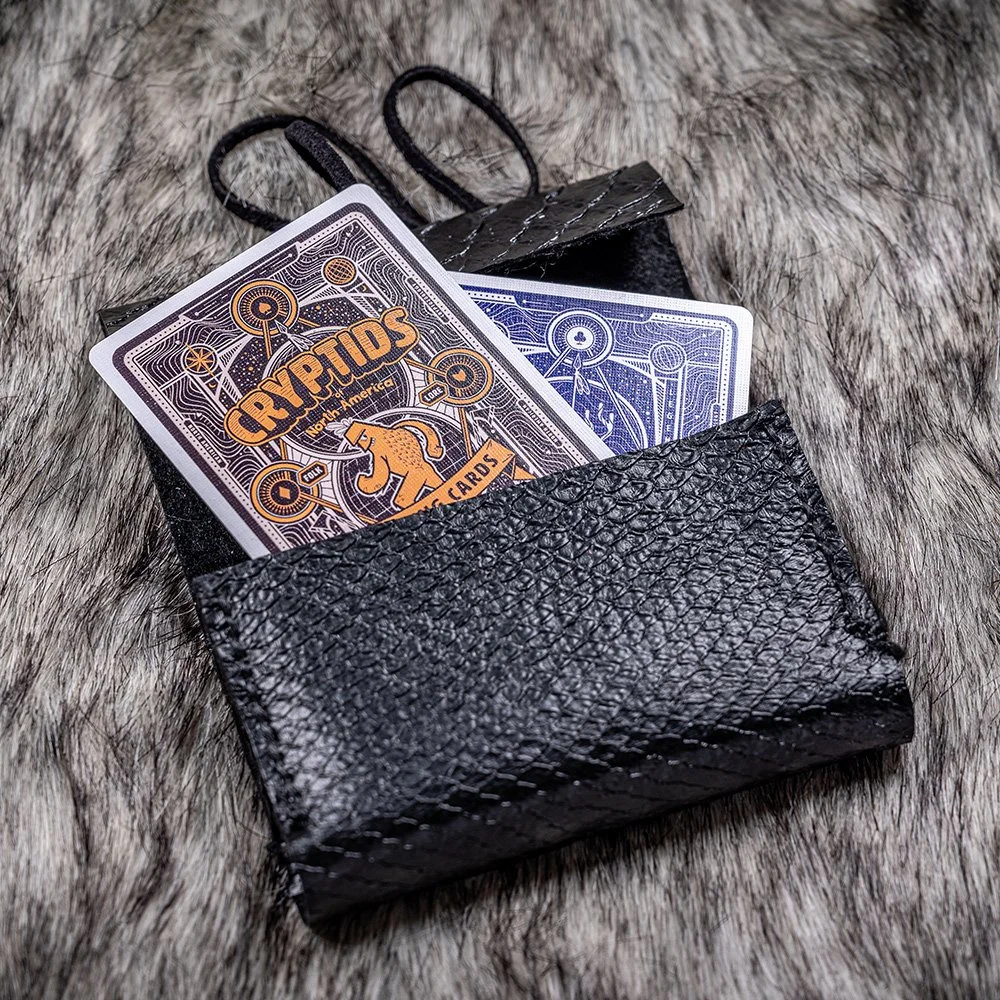
Alternative Packaging
Rather than a traditional tuck box, the 2022 Cryptids of North America deck got a little crafty with its packaging. The initial concept was to have tuck boxes that were constructed of cryptid skins—fur, scales, leather and so on—largely because fancy tuck boxes were not in the budget. The fur idea got dropped early due to production complications (cutting and stitching was too time consuming and messy). What remains are shrink-wrapped decks lovingly placed in various handmade leather pouches. Each pouch also makes an excellent dice container (holds 2 full sets) and can be repurposed to whatever your heart desires.


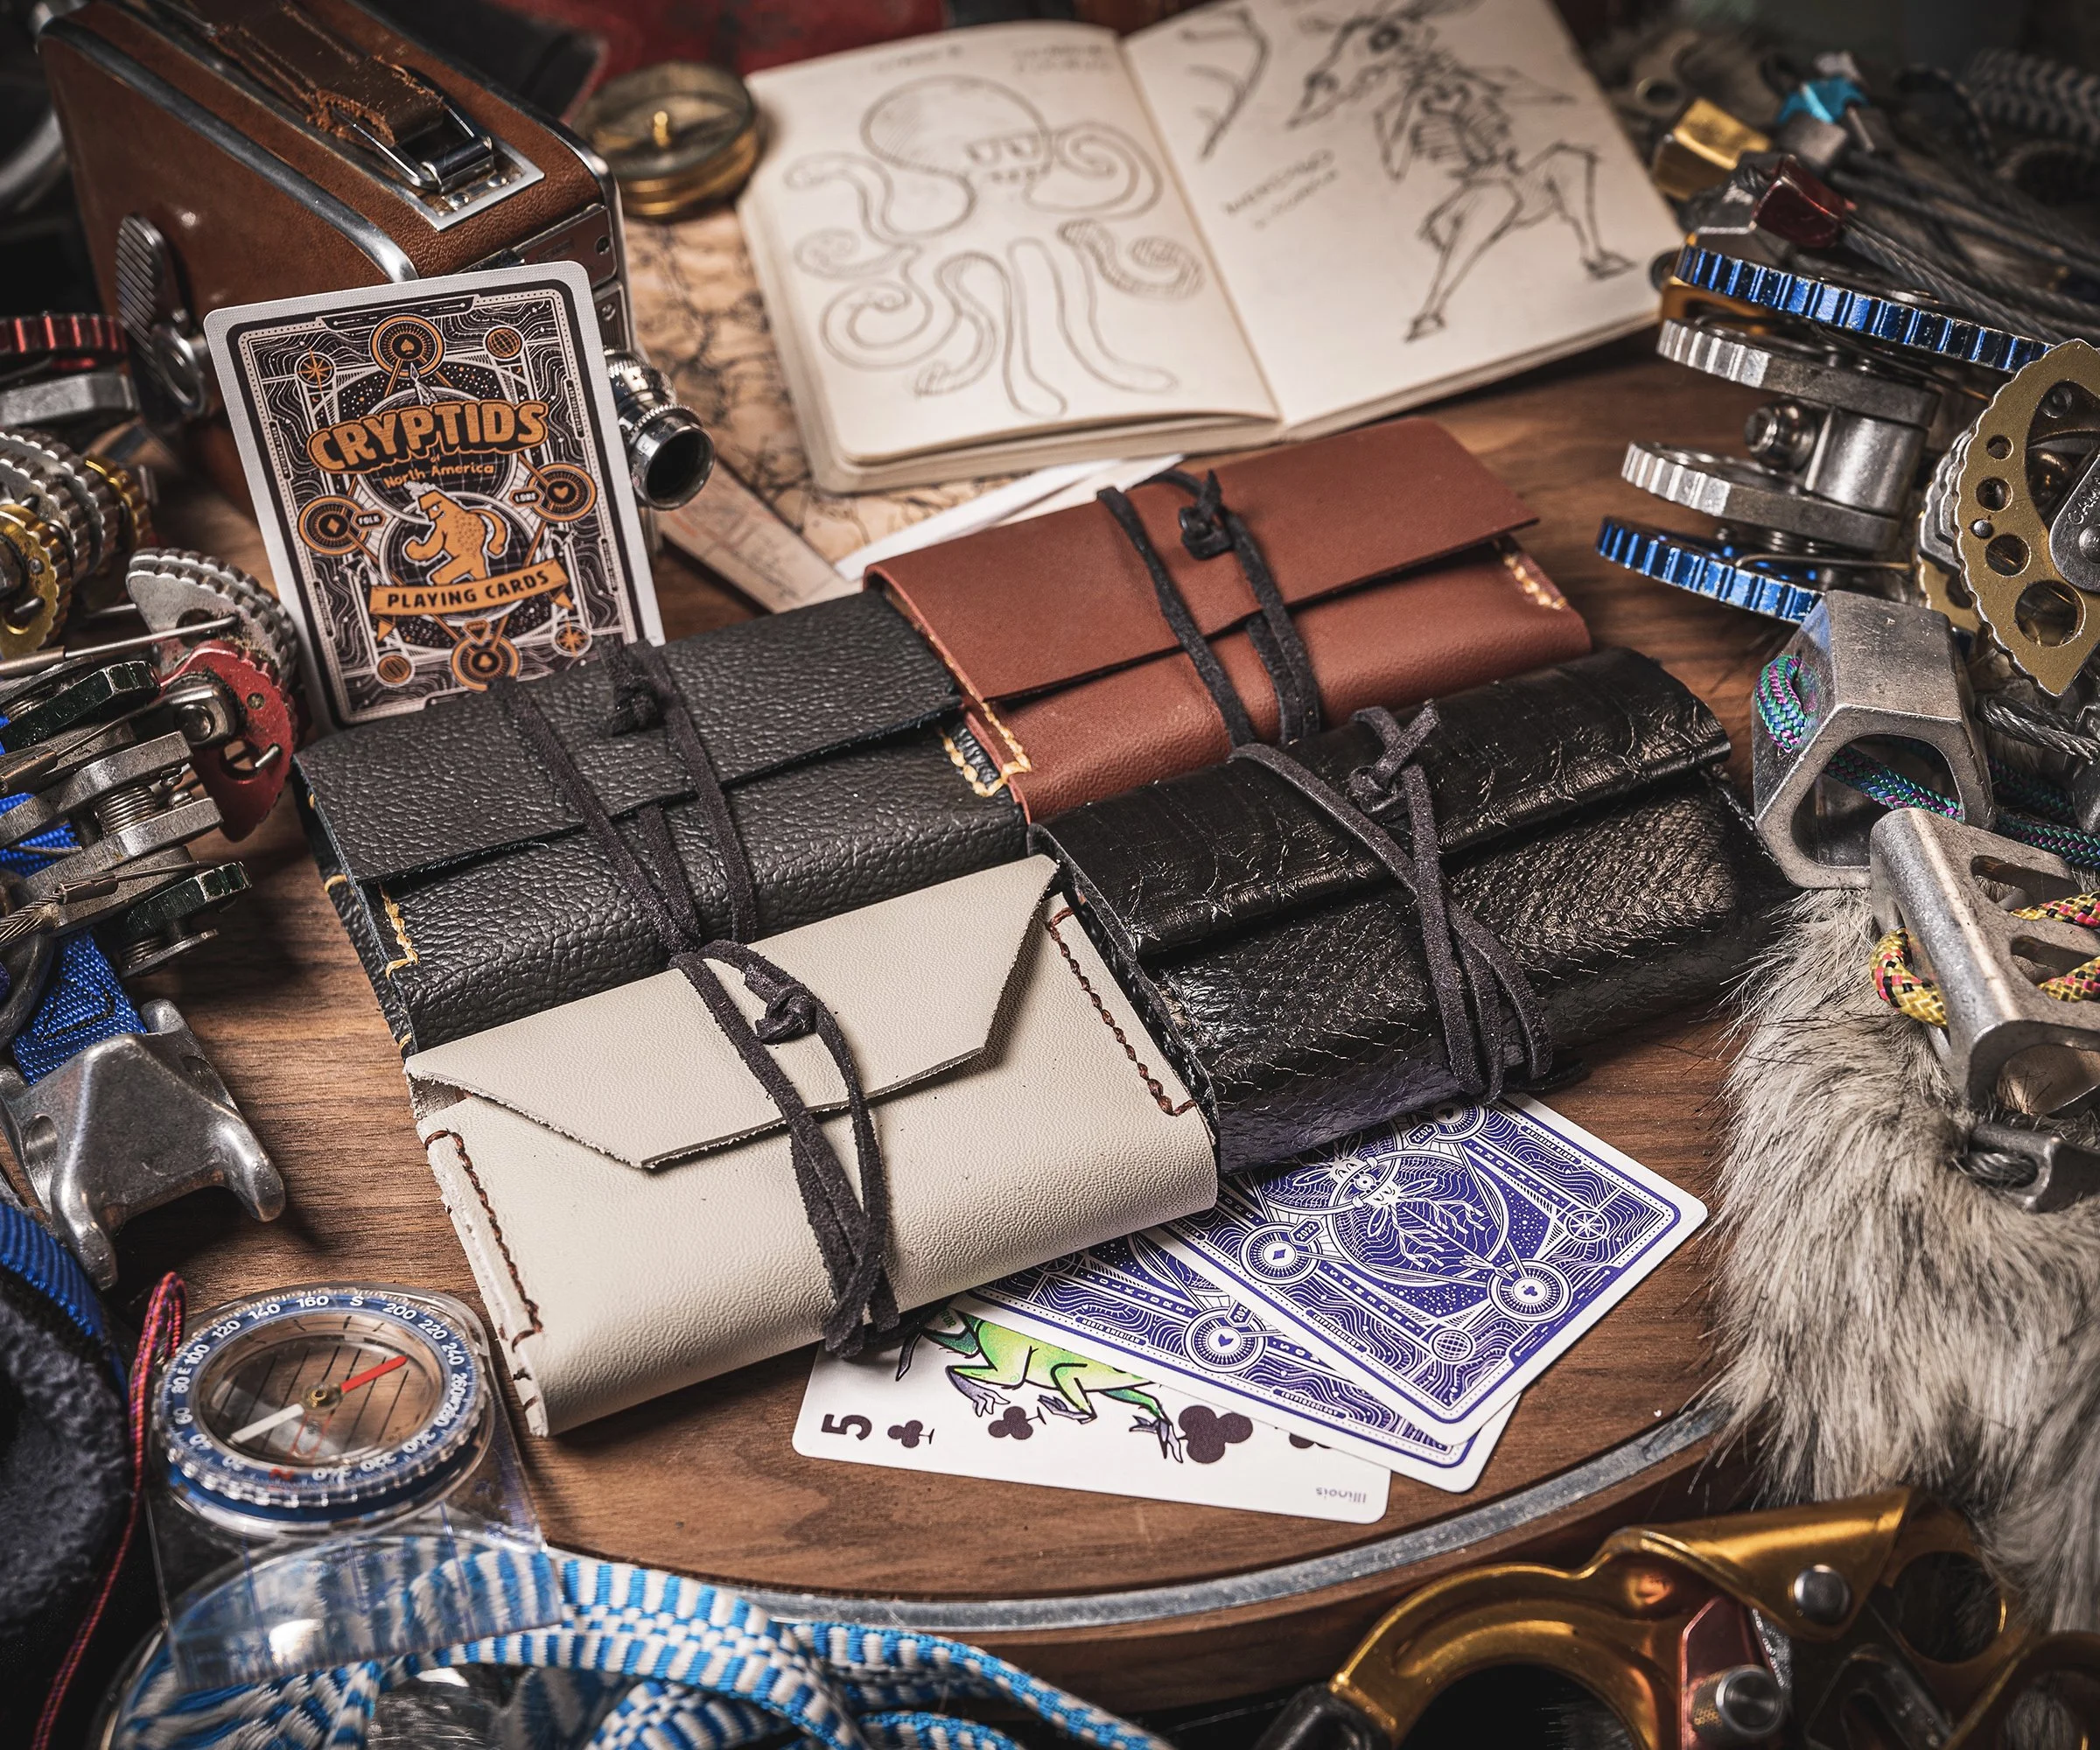
Each leather pouch takes about 45 minutes to cut and construct. The snakeskin variant is felt-lined vinyl.
Tuck Box Packaging
The 2021 Cryptids of North America deck used a more traditional tuck box design within the limits of my budget: 100 decks with a limit of $1000. Whatever remained after paying for the best card stock and finish was spent on packaging.
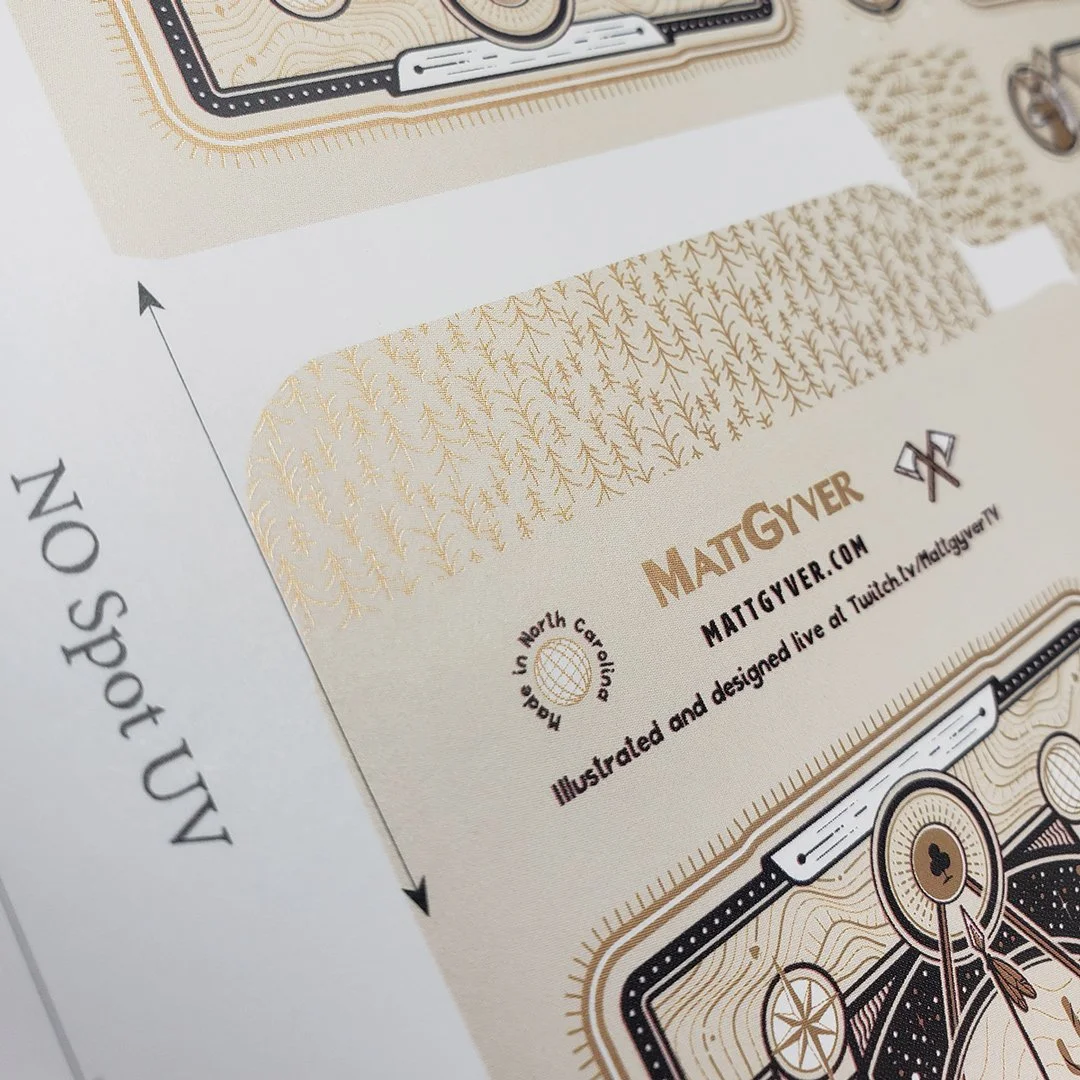
Since I’m not an industry juggernaut who can pay out of pocket for thousands of decks and crazy ridiculous printing that uses foil, die cutting, embossing, spot UV, interior printing, foil seals, and [insert even more luxurious processes here], I had to keep my dreams in check and be satisfied with a couple hits of metallic ink. Of course if I decide to run a Kickstarter or partner up, all that special stuff could happen with a little retooling of the design.
It’s also worth mentioning that the cards and tuck box don’t need to come from the same printer. Die cuts and non-standard papers would usually require ordering tuck boxes from one provider and cards from another. With this deck however, I did use Mr. Playing Card for both the cards and tuck box.


Wrapping Up
This playing card product design was the most fun I’ve had making something for myself in a long time. Completing such a detailed project is very rewarding! Disregarding the design and layout time (which must be around 100 hours 🙃), here is the cost breakdown for both deck releases, based on my budget of $1000.
2021 Deck
Manufacturer: Mr. Playing Card
Quantity: 100 decks @ $654
Poker: 54 cards @ 63mm × 88mm
Card stock: M31 Linen (best available)
Card finishing: Standard finish
Packaging: Tuck box + metallic ink @ $312
Shipping: $100
Materials: None
Assembly: None
Foil seal: None (cut for budget)
Total: $1066 ($10.66 ea.; sold for $16 ea.)
Notes: The tuck box packaging turned out quite nice with metallic inks. My budget was around $1000, so more expensive processes such as foil, embossing, spot UV, and interior printing didn’t make the final cut. Mr. Playing Card was very hands-on with an account manager, good interaction, and all around great experience. A minimum order should be no less than 50 decks, but ideally 100 because the price break is nearly 50% better.
2022 Deck
Manufacturer: MakePlayingCards
Quantity: 100 decks @ $760
Poker: 55 cards @ 63mm × 88mm
Card stock: M31 Linen (best available for qty < 1000)
Card finishing: BETA card finish
Packaging: Shrink-wrapped
Shipping: $120
Materials: Leather @ $40
Assembly: 45 minutes ea. stitching
Foil seal: None (cut for budget)
Total: $920 ($9.20 ea.; sold for $22-$26 ea.)
Notes: Although the decks themselves were slightly more expensive than the 2021 run, by hand-making the packaging instead of a proper tuck box it freed up the budget at the expense of time. It took nearly an hour to make each leather pouch, which is reflected in the cost. MakePlayingCards offers gourmet tuck box options and allows really small orders of 1-5 😀 decks if you just need prototypes for play testing and photography. Their process is largely automated.